
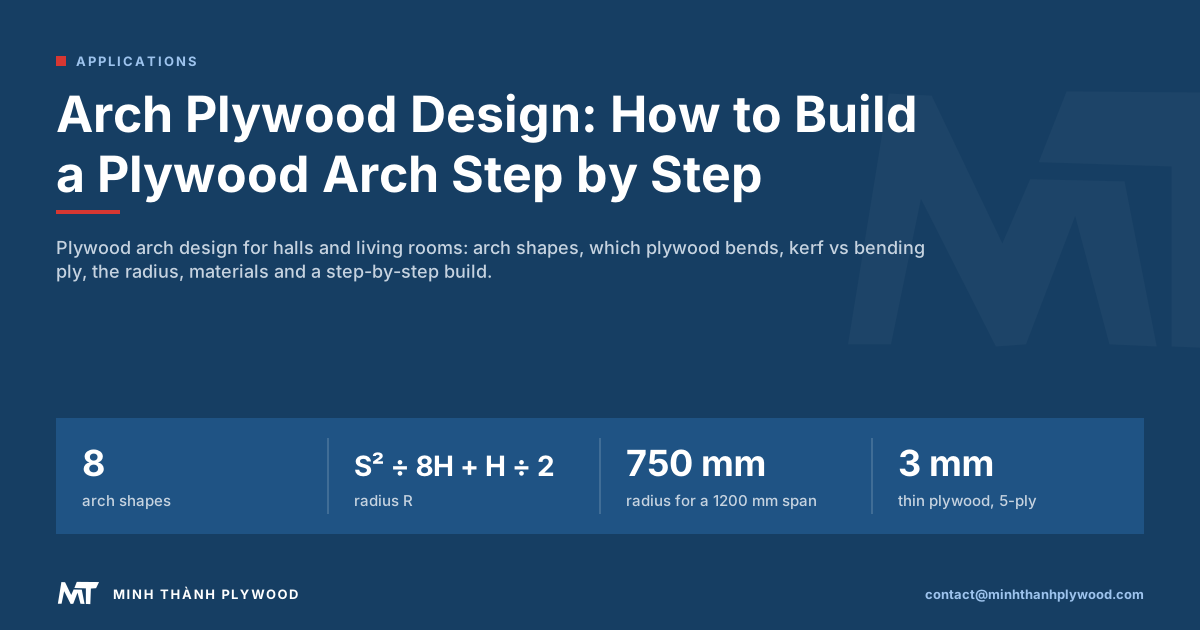
A plywood arch is built from two flat arch-shaped faces cut from 18 mm plywood, joined by spacer blocks and clad underneath with a thin plywood that bends to the curve. Arch plywood work is fast, light and easy to finish in veneer, laminate or paint. Minh Thanh Plywood makes the flat and thin panels these arches use; here are the designs, the bending choices and the build.
Why use plywood for arch design?
Plywood is used for arch design because it is light, stiff and stable, so a wide arch can be built from flat panels without heavy timber framing or masonry. It cuts cleanly to any curve, holds screws at the edge and takes veneer, laminate, paint or plaster.
Compared with other ways of making an arch:
- Against masonry or plaster arches: plywood is far lighter, needs no structural opening work and can be fitted in a day.
- Against solid timber: plywood does not split along the grain at the crown, and wide faces come from one sheet.
- Against MDF: plywood holds screws better, weighs less and resists humidity in kitchens and halls.
Arch plywood designs work as door surrounds, hall entrances, room dividers, wall niches, headboards and shelf units. The structure is the same in each: two flat faces, spacers and a curved underside.
Plywood arch shapes and where each one fits
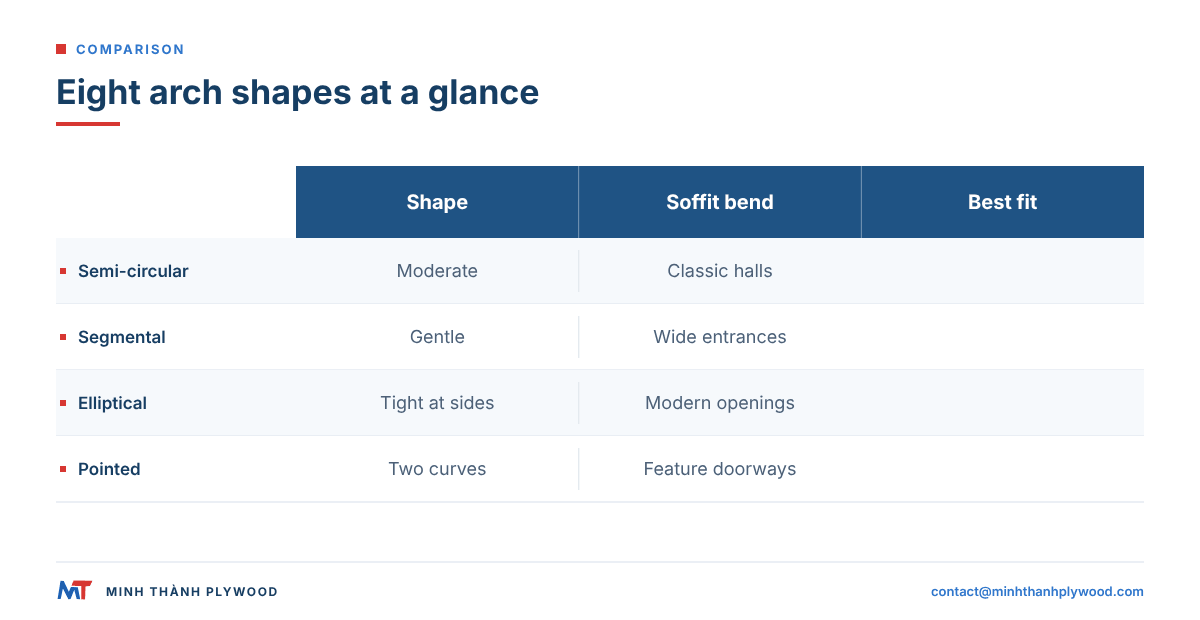
There are eight arch shapes used in homes, and the shape sets the look of the room and the radius the plywood must bend to. The table compares them for plywood arch design.
| Arch shape | How it looks | Bend on the soffit | Fits best |
|---|---|---|---|
| Semi-circular | Full half circle, rise equals half the span | Moderate | Small openings, classic halls |
| Segmental | A shallow part of a circle | Gentle | Wide entrances, living room openings |
| Elliptical | Flattened oval, soft corners | Tight at the sides | Wide modern openings |
| Pointed (Gothic) | Two arcs meeting at a point | Moderate, two curves | Feature doorways, niches |
| Flat (jack) | Straight top with slight rounded corners | Tight at the corners only | Conventional rooms |
| Five-centred | Several arcs, flatter crown | Varies | Openings between rooms |
| Cinquefoil | Five lobes cut into the arch | Cut, not bent | Decorative entrances |
| Rampant | One side springs higher than the other | Varies | Staircases, playful designs |
A segmental or semi-circular arch is the easiest first build, because the whole soffit follows one radius. Elliptical and five-centred arches need several radii and a curve that changes along the soffit.
Living room plywood arch design ideas
Living room plywood arch designs fall into five groups: entrance arches, partitions between living and dining, arches with storage, niches for TV and display, and arches with lighting. Each uses the same plywood frame with a different finish.
- Entrance arch: a semi-circular or segmental arch at the hall opening, in white paint or wood veneer.
- Arch partition: a pair of arches or a single wide arch between living and dining areas, often with slatted panels or glass in the sides.
- Arch with storage: shelves or cabinets built into the thick sides of the arch; 18 mm plywood carries the shelves.
- Arched niche: a recess for a TV unit, bar or display, lined with laminate or veneer.
- Lit arch: an LED strip routed into the soffit or the edge for a modern hall.
Modern hall plywood arch designs often combine plywood with a plastered or skim-coat finish: the plywood gives the structure and the clean curve, the plaster gives a smooth painted surface. Minimalist designs keep a thin edge and one colour; rustic designs show wood veneer and a thick reveal.
Which plywood bends for an arch?
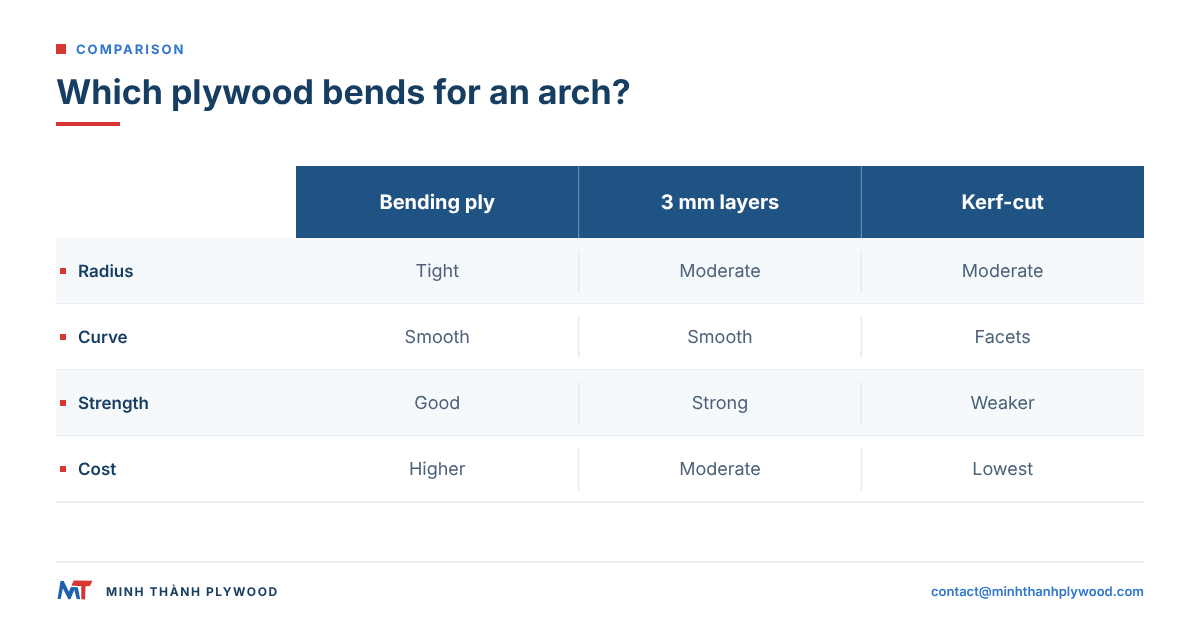
The plywood that bends for an arch is either bending plywood, whose plies all run the same way, or thin plywood of about 3 mm laminated in layers; ordinary 6 to 18 mm plywood bends only after kerf-cutting. The arch faces themselves stay flat and are cut from 18 mm sheets.
| Option | How it bends | Radius it suits | Strength of the curve | Cost |
|---|---|---|---|---|
| Bending plywood | Plies run one way, sheet curves easily | Tight | Good once glued to formers | Higher per sheet |
| Thin plywood laminated | Two or three 3 mm layers glued on the arch | Moderate to large | Strong and smooth | Moderate |
| Kerf-cut plywood | Saw cuts on the back let it flex | Moderate to large | Weaker at the kerfs | Lowest |
| Solid laminated ribs | Thin strips glued over a form | Any | Strongest | Labour heavy |
Thin plywood bends best when its plies are thin and even. Minh Thanh’s thin plywood is always 5-ply: at 3 mm it is one core veneer, two cross-band veneers and two face veneers, which gives a smoother bend than a 3-ply sheet with a thick centre ply.
Kerf vs bending ply: which to choose
Choose bending plywood for tight radii, visible soffits and repeat work, and choose kerf-cut plywood for one-off arches with a large radius and a finish that hides the back. Thin plywood laminated in layers sits between the two and suits most home arches.
How kerf bending works:
- Cut kerfs across the back of a 6 to 12 mm sheet, leaving a thin skin of about 3 mm on the face.
- Set the spacing by test. Cut one kerf in an offcut, clamp one side flat, lift the free end until the kerf closes; the lift at the arch radius gives the spacing.
- Bend and glue. Spread glue into the kerfs, bend the sheet onto the formers and fix it.
The Wood Handbook of the USDA Forest Products Laboratory (2010) explains why thin plies bend more easily than thick ones. The limits of kerfing: the face can show flat facets between kerfs on a tight curve, the skin can crack, and the panel is weaker until it is glued. Bending plywood avoids all three but costs more per sheet. For a semi-circular arch under paint, two layers of 3 mm plywood glued over the formers usually give the cleanest result.
Use plywood or OSB for an arch?
Use plywood. Both panels are cut with a jigsaw, but plywood has a cleaner, tighter edge, holds a router trim without crumbling and takes paint or veneer on the cut edge; OSB leaves a rough, flaky edge that needs a deep skim coat. Use 3/4 in (18 mm) plywood for the two faces and 2 × 4 blocking or plywood spacers between them.
Arch plywood backdrops, cutouts and decor arches
In the US, “arch plywood” often means a freestanding or wall-hung arch, not a doorway. The same arch cut from plywood is sold in three forms:
| Product | Typical size | Plywood and build |
|---|---|---|
| Wedding and party arch backdrop (3-panel stand) | 72 in high, 53 in wide, 7 in deep when set up | 1/2 to 3/4 in plywood panels on hinges, or thin flexible ply; painted or fabric-covered |
| Graduated arch panel set | From 3 ft wide and 5 ft tall up to about 7 ft | One large and two smaller arches, each on a foot or stand |
| Small decor arch (craft blank, sign, mirror frame) | 31.97 × 20 in, 0.8 in deep | Thin birch or poplar plywood, keyhole mount or easel back |
| Arch-shaped headboard or mirror | To the bed or wall width | 3/4 in plywood face, upholstered or veneered |
Design points: wide feet or a hinged stand stop the arch tipping; a 3/4 in edge needs a full-height rail or a cleat on the back; and every arch cut from the same template repeats exactly. Decor makers buying CNC-ready birch or poplar sheets in volume get calibrated 3 mm to 18 mm panels from Minh Thanh by the container, cut to the maker’s layout.
How to calculate the radius of an arch
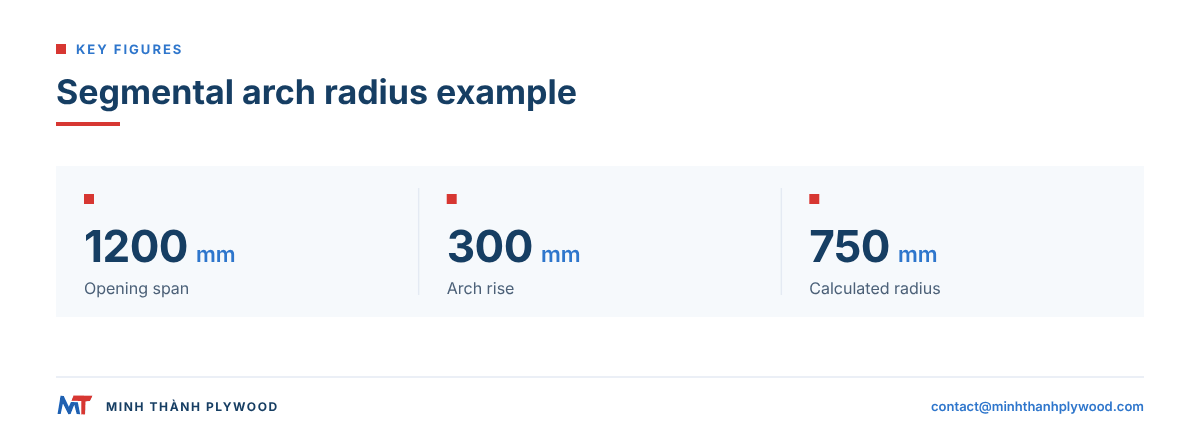
The radius of an arch is the span squared divided by eight times the rise, plus half the rise: R = S² ÷ (8 × H) + H ÷ 2. With the radius you can set the trammel and cut both arch faces.
A worked example for a segmental living room arch:
- Span (S): 1200 mm (about 48 in), the width of the opening.
- Rise (H): 300 mm (about 12 in), the height of the curve above the springing line.
- Radius: 1200² ÷ (8 × 300) + 300 ÷ 2 = 600 + 150 = 750 mm. In inches: 48² ÷ (8 × 12) + 12 ÷ 2 = 24 + 6 = 30 in.
- Inch conversion: inch sizes use the exact NIST definition of 1 inch = 25.4 mm.
The centre of the circle sits on the centre line of the opening, one radius below the crown. For a semi-circular arch the rise is half the span, so the radius is simply half the span. Mark the centre point on a scrap board fixed across the panel, so the trammel has something to pivot on.
Tools for building plywood arches
The tools to build a plywood arch are a trammel and tape for marking, a jigsaw and a router for the curve, a circular saw for kerfs, a drill and brad nailer, clamps, glue and a sander. A table saw makes the spacer blocks faster but is not essential.
- Trammel: a strip of plywood with a nail at one end and a pencil or router base at the other.
- Jigsaw: cuts the rough curve; use a fine, sharp blade to limit chipping.
- Router: trims the curve smooth on the trammel and cuts both faces to the same line.
- Circular saw: cuts kerfs to depth when kerf bending.
- Clamps and glue: hold the bent soffit while the glue cures.
- Brad nailer and screws: fix spacers and the soffit to the faces.
- Random orbit sander: blends the joint between soffit and faces.
Materials list for a plywood arch
A plywood arch for a standard interior opening needs two 18 mm sheets for the faces, offcuts for the spacers, a thin bending sheet for the soffit and the finishing materials. The list below covers a single arch.
| Item | Specification | Use |
|---|---|---|
| Arch faces | 18 mm (3/4 in category) furniture plywood, 1220 × 2440 mm (4 × 8 ft sheet) | Two flat arch-shaped faces |
| Spacer blocks | 18 mm offcuts ripped to the wall depth | Hold the faces apart, carry the soffit |
| Soffit | Bending plywood, or two layers of 3 mm (1/8 in) plywood | The curved underside |
| Glue | PVA wood glue, or construction adhesive | Spacers, soffit layers |
| Fixings | Brad nails, wood screws, wall plugs | Assembly and fixing to the wall |
| Filler | Wood filler or joint compound | Joints and nail holes |
| Finish | Veneer, laminate, primer and paint, or POP | The visible surface |
Order sheets with a calibrated thickness so the two faces match and the soffit sits flush; a loose tolerance shows as a step on the edge of the arch.
How to cut an arch in plywood
To cut an arch in plywood, mark the curve with a trammel from the centre point, cut just outside the line with a jigsaw and trim to the line with a router pivoting on the same point. Both faces are cut together or from one template, so they match.
- Fix the sheet on a flat bench with the good face down if you cut with a jigsaw.
- Mark the centre on the centre line, one radius below the crown.
- Draw the arc with the trammel, then draw the inner arc for the face width.
- Rough cut just outside the line with the jigsaw.
- Router trim to the line on the trammel for a smooth, true curve.
- Make a template from the first face, then copy the second face with a flush-trim bit.
Cutting the second face from a template is faster and more accurate than marking it again. The two faces must be identical, or the soffit twists.
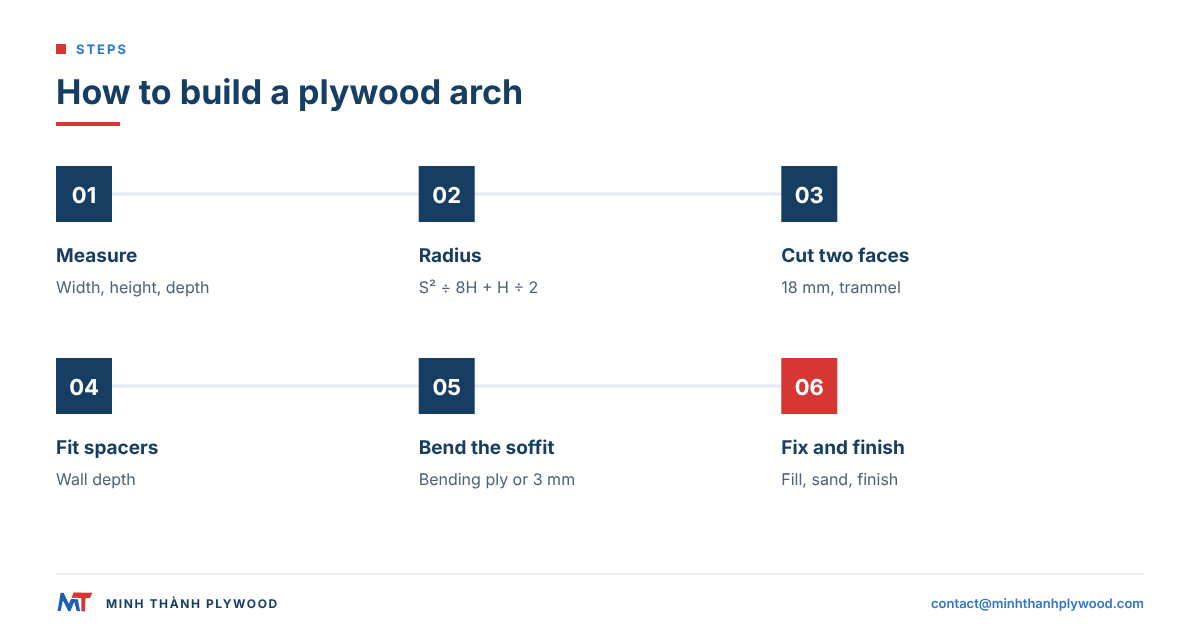
How to build a plywood arch: step by step
Building a plywood arch takes ten steps, from measuring the opening to finishing the surface. The method below suits a door opening or a living room partition.
- Measure the opening: width, height and wall thickness at several points.
- Choose the shape and rise, then calculate the radius.
- Cut the two faces from 18 mm plywood with the trammel and router.
- Rip spacer blocks to the wall thickness minus the two faces.
- Fix spacers between the faces along the curve, close enough to support the soffit. Flat 2 × 4 blocking between the two faces works as well as plywood spacers.
- Fit the soffit: glue and nail bending plywood, or two layers of 3 mm plywood, to the spacers and the face edges.
- Trim the soffit flush with both faces using a flush-trim bit or a sander.
- Fix the arch into the opening with screws into the studs or wall plugs.
- Fill and sand joints, nail holes and the line between soffit and faces.
- Finish with veneer, laminate, paint or POP.
For a partition with storage, build the sides as boxes from 18 mm plywood first, then add the arch on top. More builds in the same style are collected in plywood projects.
How to finish a plywood arch
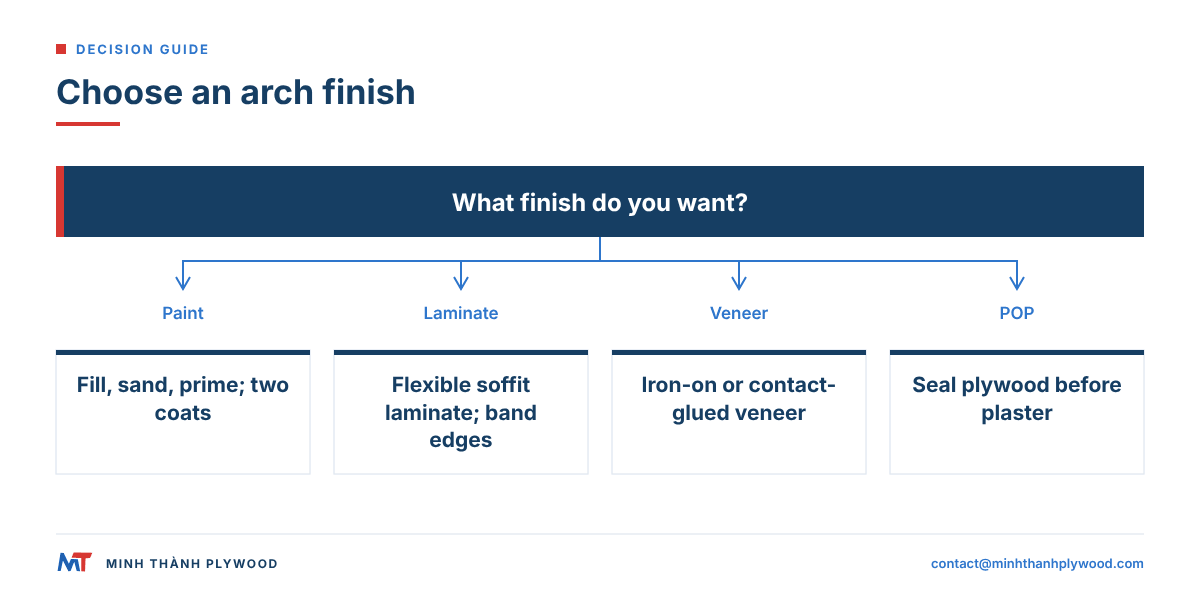
A plywood arch is finished with paint, laminate, veneer or plaster, and the choice decides how much filling the joints need. Paint shows every step; veneer and laminate hide small ones.
- Paint: fill joints and nail holes, sand smooth, prime and apply two coats. A sanded, even face saves filling time.
- Laminate: glue laminate to the faces first, then to the soffit with a flexible laminate grade; edge-band the front edges.
- Veneer: iron-on or contact-glued veneer gives a natural wood look on modern and rustic designs.
- POP: apply plaster of Paris over the plywood frame for a smooth plastered finish; seal the plywood first.
- Edges: an exposed layered edge suits minimalist designs only when the core has no gaps; otherwise band it.
Which plywood to buy for an arch partition
Buy a calibrated furniture plywood with a sanded face, a closed core and UF glue at E0 emission for indoor arches, and choose MR or melamine-fortified glue for humid rooms. Judge the panel by its specification, not by its brand name.
What to check before buying for an arch:
- Thickness tolerance: both faces must match; sanded furniture panels from Minh Thanh are held to ±0.2–0.3 mm, down to ±0.2 mm.
- Closed core: no gaps that open when the curve is cut or the edge shows.
- Flatness: a flat face keeps the arch faces true; Minh Thanh presses furniture panels twice, core first, then face and back.
- Face: poplar or eucalyptus faces take paint well; birch and EV faces suit clear and veneer finishes.
- Emission: UF glue at E0 emission for living rooms and bedrooms. In the US, the limit for veneer-core hardwood plywood is 0.05 ppm under 40 CFR 770.10.
The same panels serve the furniture around the arch; see plywood furniture design and furniture plywood from Vietnam.
Common mistakes in plywood arch work
The most common plywood arch mistakes are faces that do not match, a soffit that cracks or shows facets, and an arch fixed to an opening that is not square. All three come from skipped measuring or the wrong bending method.
| Mistake | Result | How to avoid it |
|---|---|---|
| Faces cut separately | Soffit twists, edge steps | Cut the second face from a template |
| Kerfs too far apart | Flat facets on the curve | Set spacing with a test kerf |
| Too thick a sheet bent dry | Cracks at the crown | Use bending plywood or 3 mm layers |
| Spacers too far apart | Soffit dips between them | Space spacers closely along the curve |
| Opening not measured at several points | Gaps against the wall | Measure width and height at three points |
| Paint on raw joints | Lines show through | Fill, sand and prime first |
What this means for your plywood order
For arch and partition work, a joinery or fit-out company orders flat 18 mm faces and thin bending stock together, so send one specification that covers both.
A typical specification for interior arch and partition work:
- Application: interior arches, partitions and built-in units
- Core: white Styrax, closed, stitched
- Glue and emission: UF glue at E0 emission
- Face and back: poplar A/B for paint, or EV for veneer finishes, sanded
- Thickness and size: 18 mm plus 3 mm thin plywood, 1220 × 2440 mm, tolerance ±0.2 mm
- Packing and quantity: export pallets, one 40HC with mixed specifications, destination port
Minh Thanh sends free samples with the quotation; emission certificates are on the quality page. See thin plywood for the 3–6 mm range, then send your specification to contact@minhthanhplywood.com.
Buyer questions, answered
Which plywood bends for an arch?
Bending plywood (flexible plywood) bends tightest because its plies all run one way. Thin 3 mm plywood laminated in two or three layers bends to most arch radii, and thicker plywood bends once its back is kerf-cut.
Kerf cutting or bending plywood: which is better for an arch?
Bending plywood gives a smooth, strong curve with no cutting and suits tight radii and visible soffits. Kerf cutting uses ordinary plywood and is cheaper for a few large curves, but the kerfs weaken the panel and can show through a thin finish.
How do you cut an arch in plywood?
Fix a trammel, a thin strip with a pivot nail at the centre of the circle, and draw the arc. Cut just outside the line with a jigsaw, then trim to the line with a router on the same trammel for a smooth curve.
What tools do you need to build a plywood arch?
A tape and trammel for marking, a jigsaw and a router to cut the curve, a circular saw for kerfs, a drill and brad nailer, clamps, wood glue and a sander. A table saw helps to rip spacer blocks.
Why use plywood for arch design?
Plywood is light, stiff and stable, so a large arch can be built from flat panels without heavy framing. It cuts cleanly to curves, holds screws and takes veneer, laminate, paint or plaster.
What thickness of plywood is used for an arch?
18 mm for the two arch faces and the spacer blocks, and 3 mm plywood in two or three layers, or bending plywood, for the curved soffit. Thinner 12 mm faces suit light decorative arches.
How do you calculate the radius of an arch?
Radius equals the span squared divided by eight times the rise, plus half the rise. A 1200 mm wide opening with a 300 mm rise needs a 750 mm radius.
What is a living room plywood arch design?
It is a plywood arch used as an entrance, a partition between living and dining areas, or a niche for shelves and TV units, often finished in laminate or veneer with built-in lighting.
Can a plywood arch be painted or finished with POP?
Yes. Fill the joints and sand smooth before painting, or apply plaster of Paris (POP) over the plywood frame for a plastered look. For a wood look, use veneer or laminate.
Which plywood is best for an interior arch partition?
Choose a calibrated furniture plywood with a sanded face, a closed core and UF glue at E0 emission for indoor rooms. In humid rooms, ask for MR or melamine-fortified glue. Judge the panel by its specification rather than its brand name.