
Burnt plywood flooring is plywood whose face has been charred with a torch, brushed to lift the grain and sealed, a sheet-material version of the Japanese shou sugi ban finish. It works when the face veneer is thick and sound enough to take a light char, the grain has contrast, and the floor finish locks in the soot. Pine and eucalyptus faces char best. Minh Thanh Plywood makes sanded pine, eucalyptus and birch-faced panels for this finish in Phu Tho, Vietnam.
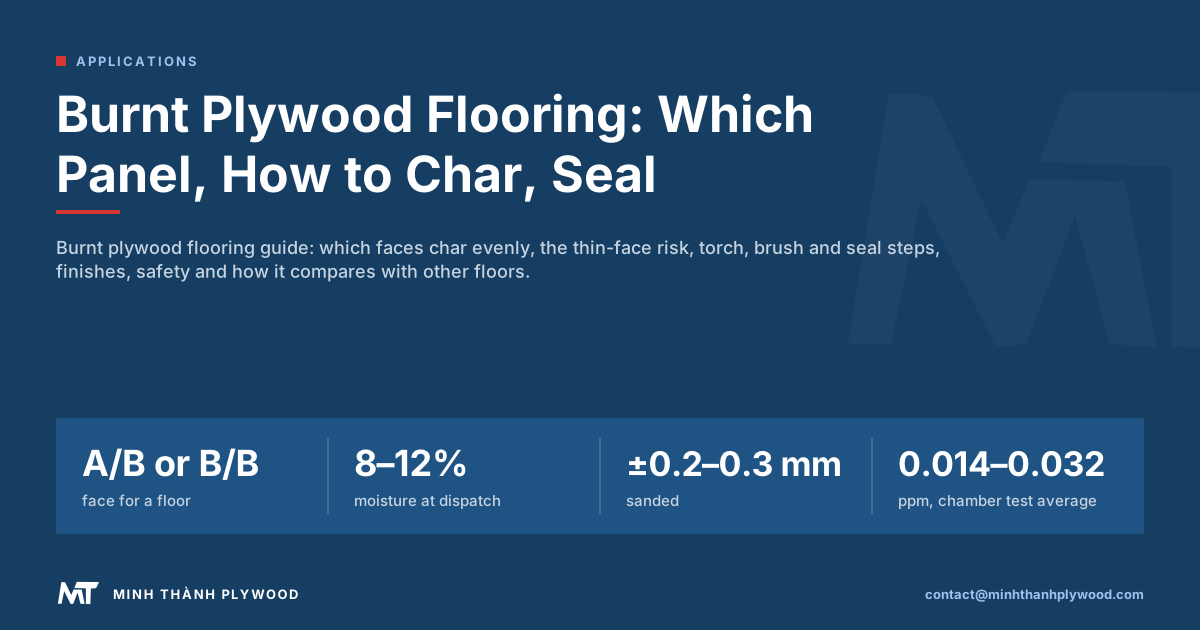
Burnt plywood flooring: what it is and why it is used
Burnt plywood flooring is a plywood floor whose face has been scorched with a flame, brushed and sealed to give dark, raised grain over lighter wood. It gives the look of charred timber boards at the cost and speed of sheet material.
Designers use it in cafés, bars, shops, studios and homes with an industrial or Japanese style. Three things make it attractive:
- Character. Charring turns plain rotary-cut grain into strong dark and light figure.
- Speed. One 1220 × 2440 mm sheet covers about 2.98 m² in one piece, so a room is laid in a day.
- One material. The same panel is the floor structure and the finished surface when it is thick enough.
The result depends on the panel more than on the torch. A face that chars evenly and stays bonded is the first decision.
Burnt plywood floor ideas: ten looks to copy
Most searches for burnt plywood flooring start with the picture, so here are ten looks that work on sheet material, each with the one choice that makes it work. The how-to steps for all of them follow in the sections below.
- Full-sheet grid with black screws. Lay 1220 × 2440 mm sheets edge to edge, char lightly and screw each corner with black countersunk screws. The grid reads as a deliberate pattern and a room is laid in a day.
- Ripped planks. Rip sheets into long planks and lay them with a random stagger. This is the closest to a charred board floor and the most common café look.
- Herringbone from strips. Cut strips of equal length and lay them in a herringbone. It costs more labour, and the char shows the grain change at every joint.
- Light toast under white oil. Torch only enough to colour the springwood, brush, then finish with a white-pigmented hard-wax oil. A pale Scandinavian floor with a visible grain.
- Black char with a satin finish. Char evenly to black, brush gently and seal with two or three coats of satin polyurethane. A dark floor that hides dust and wears evenly under a film finish.
- Two-tone border. Char the centre panels and leave a band of natural plywood around the edge, or reverse it. It frames the room and hides cut tolerance at the walls.
- Charred walls with a matching floor. Run the same panel up a feature wall. The floor and wall share one grain and one finish.
- Café and retail counters. Use the same charred panel for the counter front and the floor, edge-sealed, in a bar or shop fit-out.
- Brushed silver grey. Brush harder after a light char so the soft wood is removed and the grain stands up in relief. Seal with a clear matt finish.
- Charred stair treads and landings. Use the same finish on treads; see our guide to plywood stair treads.
Pine and eucalyptus faces give the strongest relief for the planked and brushed looks, and a sanded face with a sound grade is the base for every one of them. For other plank looks see our plywood plank flooring ideas. For a written walk-through of the torch, brush and seal steps, see the numbered method further down this page and a third-party guide such as Working the Flame.
Where does the look come from: shou sugi ban on plywood
The look comes from shou sugi ban, also called yakisugi, a Japanese method of charring cedar boards to protect and colour them. On plywood, the same three moves are used on a thinner wood face: char, brush, seal.
- Char: the flame turns the surface dark brown or black.
- Brush: a wire or nylon brush removes the soft, burnt springwood faster than the harder latewood, so the grain stands up in relief.
- Seal: an oil or a floor finish fixes the soot and gives the wear surface.
Traditional yakisugi chars deep, because a thick cedar board can lose a few millimetres. A plywood face cannot, so plywood is charred lightly and brushed gently. That single difference decides which panels work.
Can you torch plywood without ruining it?
You can torch plywood without ruining it if the flame only colours the face veneer and never stays long enough to burn through. The face veneer on most plywood is a fraction of a millimetre to about a millimetre thick, so the char must stay on the surface.
What goes wrong when torching is too heavy:
- Burn-through: the face is consumed and the cross-band ply shows as a patch of different grain.
- Blistering: heat at the glue line lets the face lift in bubbles.
- Cracks: deep char splits along the grain as it cools.
- Uneven tone: a hesitating flame leaves dark rings.
A steady sweep of the torch, about the speed of a slow paint stroke, keeps the heat in the top of the face. Test on an offcut of the same panel first and keep that offcut as the colour sample.
Which plywood is best for burnt plywood flooring?
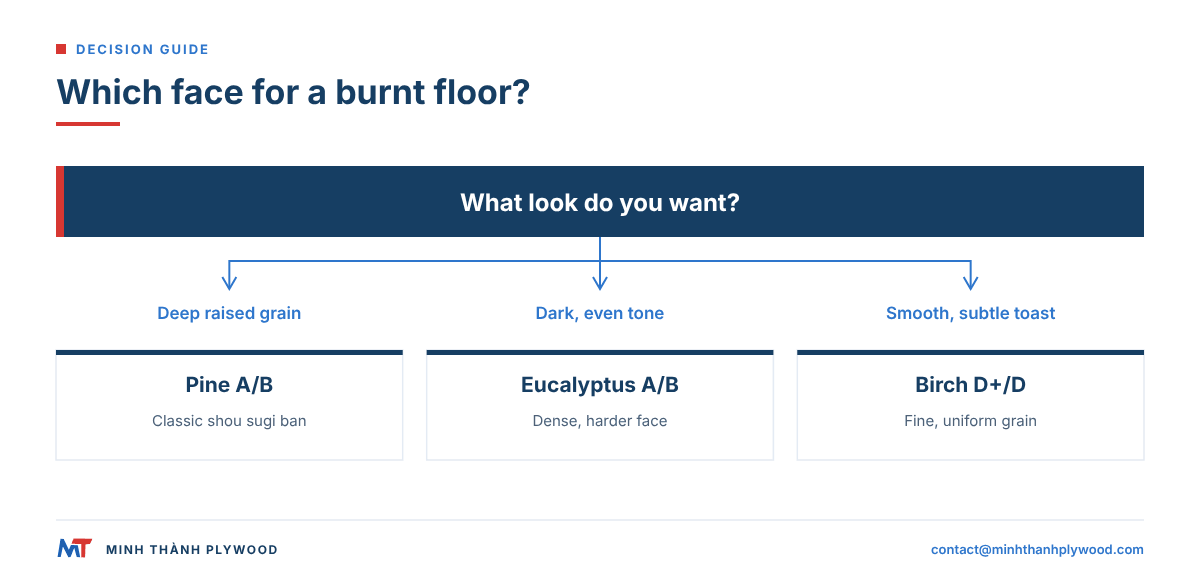
Pine-faced plywood is the best choice for burnt plywood flooring when strong grain texture is wanted, and eucalyptus is the best choice for a dense, even dark tone. Birch and poplar work for softer looks.
| Face | How it chars | After brushing | Best for |
|---|---|---|---|
| Pine (A/A, A/B, B/B) | Fast, strong contrast between early and latewood | Deep raised grain | Classic shou sugi ban look |
| Eucalyptus (A/A, A/B, B/B) | Slower, dense, even dark brown | Fine texture, little relief | Dark, calm floors, harder surface |
| Birch (D+/D, D/D) | Smooth, even, honey to dark brown | Very little relief | Toasted, subtle look |
| Poplar (A/A, A/B, B/B) | Fast, light, fairly flat tone | Little relief | Light toast under a tinted finish |
| Okoume | Even, reddish brown | Fine texture | Warm brown floors |
Choose an A/B or B/B face for a floor: small knots char darker and become part of the pattern, but open splits and loose patches burn through first. Birch is graded D+, D and E in Vietnam, close to European B, BB and CP/C, and quoted as pairs such as D+/D.
Our pine plywood page and eucalyptus-faced plywood page list the face grades and thicknesses.
The thin-face risk: why the core and pressing matter
The main risk with charred plywood is a thin face over a weak core: the face burns through, or heat finds a void under it and the face blisters. A well-built panel spreads heat evenly and holds the face down.
Four build details reduce the risk:
- Solid core plies. Voids under the face trap hot air and blister. Our cores are stitched both across and along the panel, so gaps do not open.
- Double pressing. Our furniture-grade panels are pressed twice: the core board is pressed and calibrated, then face and back are pressed on. The face bonds to a flat, even core.
- Sanded, calibrated faces. Even thickness means even sanding before charring, so no area of face is thinner than the rest. Sanded panels hold ±0.2–0.3 mm.
- Dry panels. Panels at 8–12% moisture char evenly; wet patches resist the flame and then crack.
Cores are white Styrax or Eucalyptus as standard, with Acacia and Pine made on order. A Eucalyptus core is denser, at about 650 kg/m³, and adds stiffness for a floor laid on joists.
Which glue bond suits charred plywood?
For burnt plywood flooring, choose a bond for the room, and protect any bond by keeping the char on the surface. The flame should never reach the glue line, whatever the resin.
| Room | Bond to specify | Note |
|---|---|---|
| Dry interiors: living rooms, shops, cafés | UF glue at E0 emission | Lowest formaldehyde for interiors |
| Kitchens, entrances, ground floors | Melamine-fortified (MR) | Spills and damp air |
| Outdoor cladding, covered terraces | Phenolic (WBP) | Weather exposure |
Low emission matters on a floor that fills a whole room. The US rule is the EPA formaldehyde standards for composite wood, and the limit for veneer-core hardwood plywood is 0.05 ppm under the EPA formaldehyde emission standards. Our interior panels use UF glue at E0 emission and are certified under CARB P2 / TSCA Title VI as ICTT mill no. 23024. Six chamber tests between April 2025 and June 2026 averaged 0.014–0.032 ppm against that limit.
How to burn plywood floors: step by step
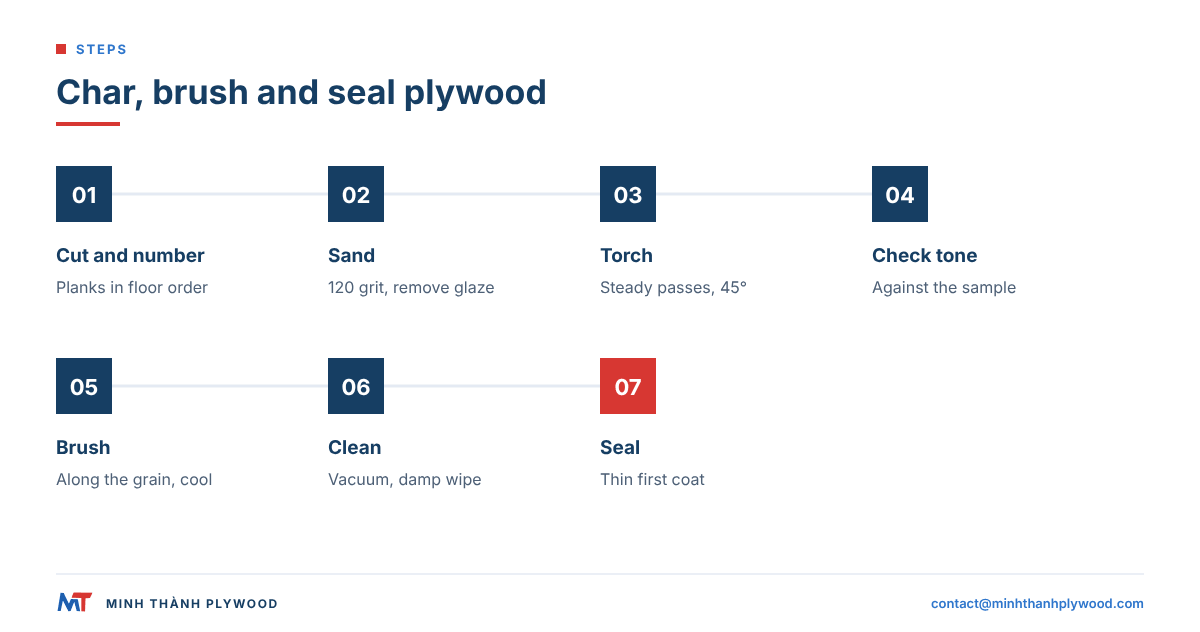
Burn plywood floor panels before installation: sand, torch in steady passes, brush, clean and seal. These steps give an even result on full sheets or planks.
- Cut to size. Rip the sheets into planks if a board look is wanted, and mark each piece’s place in the floor.
- Sand. Sand the face with 120 grit to remove mill glaze and dust so the flame acts evenly.
- Set up. Work outdoors or in a ventilated workshop, panels on metal trestles, with a fire extinguisher and a water bucket at hand.
- Torch. Hold a propane torch at about 45° and sweep along the grain at a steady pace, overlapping each pass.
- Check the tone. Compare with the sample offcut; add a second light pass rather than slowing the first.
- Brush. When cool, brush along the grain with a brass, nylon or stiff fibre brush to remove loose char and lift the grain.
- Clean. Vacuum, then wipe with a damp cloth until it comes away almost clean.
- Dry. Leave the panels to dry fully, usually overnight.
- Seal. Apply the first coat of finish to lock in the char; see the next section for the finish choice.
Number each panel on the back so the tone runs evenly across the room when laid.
How do you seal a burnt plywood floor?
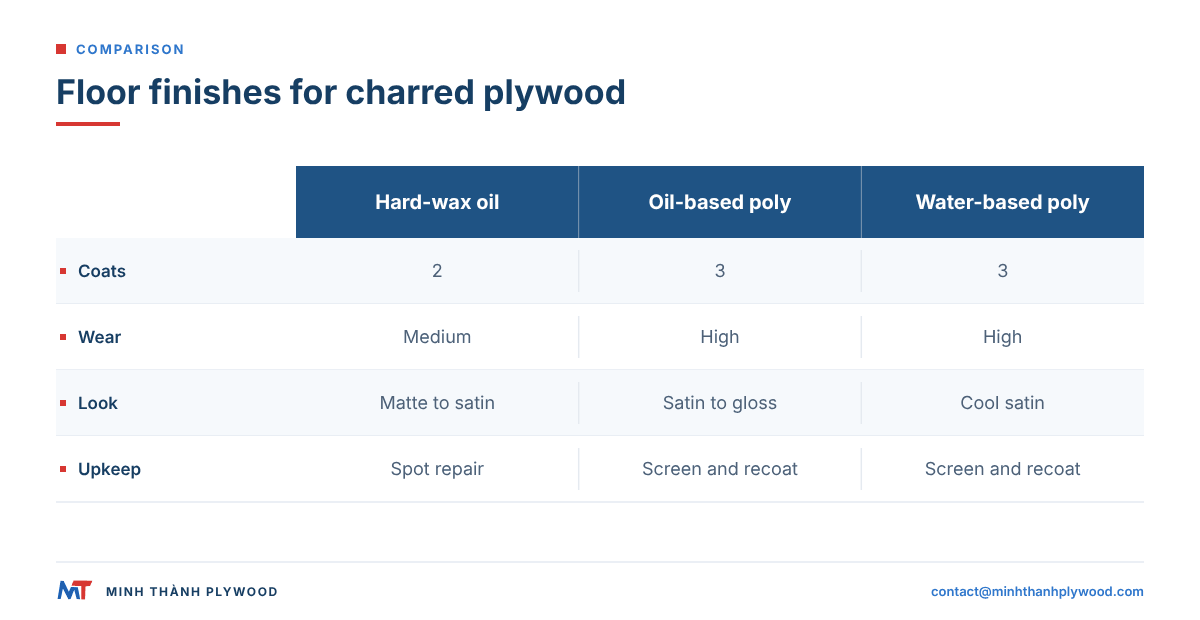
Seal burned plywood flooring with a penetrating oil or sealer first, then build a floor-rated wear coat on top. Without a sealed surface, the char rubs off onto shoes and furniture.
Finishes for burned plywood flooring
| Finish | Look | Wear | Upkeep |
|---|---|---|---|
| Penetrating oil only | Matte, deepest black | Low on floors | Re-oil often; best on walls |
| Hard-wax oil, 2 coats | Matte to satin, natural | Medium | Spot repair, re-oil traffic lanes |
| Oil-based polyurethane, 3 coats | Satin to gloss, ambers slightly | High | Screen and recoat |
| Water-based polyurethane, 3 coats | Satin, keeps colour cool | High | Screen and recoat |
| Water-based poly over an oil sealer | Deep colour, clear wear coat | High | Screen and recoat |
The first coat on a charred surface should be thin and laid with a pad or brush, not rubbed hard, or it pulls soot into streaks. Sand lightly with a fine pad between coats, never through the char. Our faces leave the factory sanded and UV-ready, so a finish line gets an even surface to work on.
Torched plywood floors: char levels from light to deep
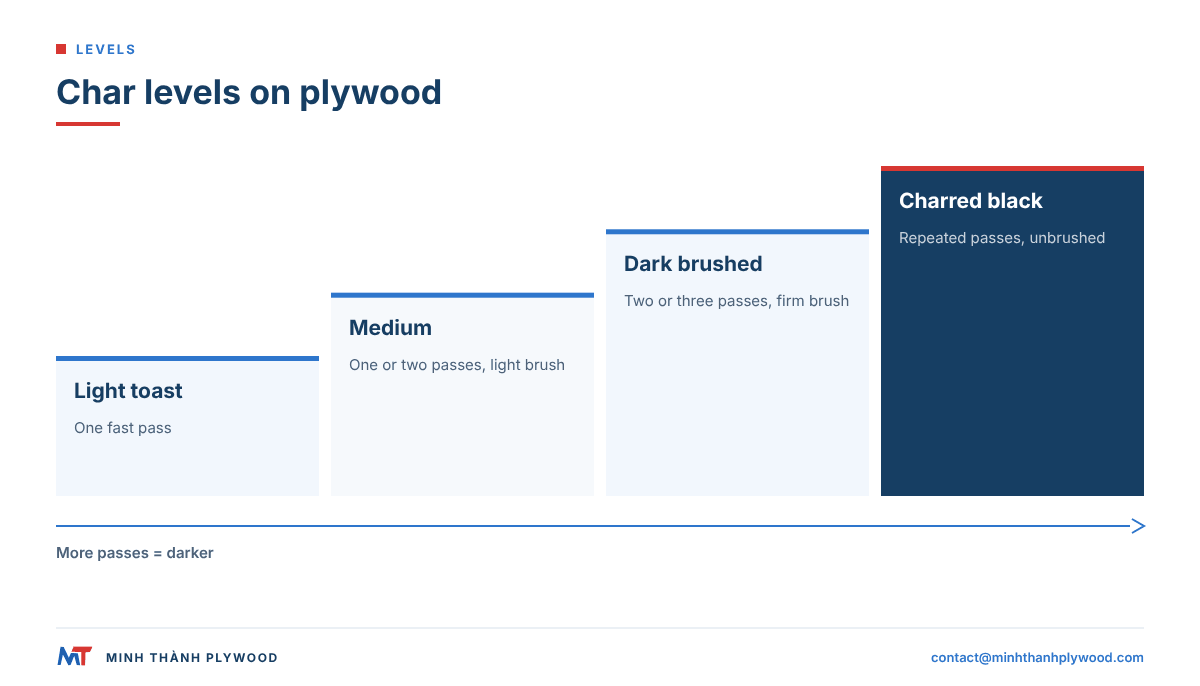
Torched plywood floors range from a light toast to a deep brushed black, and the level is set by the number and speed of passes, not by slowing the flame. Pick the level from the sample before production.
| Level | How it is made | Look |
|---|---|---|
| Light toast | One fast pass, no brushing | Honey to amber, grain darkened |
| Medium | One or two passes, light brushing | Brown, grain clearly drawn |
| Dark brushed | Two or three passes, firm brushing | Dark brown to black, raised grain |
| Charred black | Repeated passes, sealed without brushing | Uniform black, flat texture |
Plywood flooring torched to the charred-black level suits walls and low-traffic rooms best, because any chip shows the lighter wood. On floors, the dark brushed level hides wear better.
Is charring plywood indoors safe?
Charring plywood indoors is not safe, and it is not needed: panels are charred before installation, outdoors or in a ventilated workshop, then brought in sealed. A building interior has dust, finishes and hidden spaces that catch fire easily. In England, fire safety in buildings is covered by Approved Document B.
Workshop rules for charring panels:
- Work on metal trestles over a non-combustible floor, never on a wooden bench.
- Keep a fire extinguisher, a water bucket and a second person nearby.
- Wear gloves, eye protection and a respirator rated for smoke and fine dust.
- Let panels cool fully before stacking them; check stacks again after an hour.
- Keep brushed soot out of drains and dispose of it with workshop waste.
Treat any surface finish a panel carries as fuel: char only bare, sanded wood.
Plywood burnt floors vs other floor finishes
Plywood burnt floors cost less than charred solid boards and lay faster, while giving a real wood surface that vinyl and laminate imitate. They trade some wear depth for that speed.
| Measure | Burnt plywood floor | Charred solid boards | Engineered wood | Laminate or vinyl with a burnt print |
|---|---|---|---|---|
| Surface | Real charred wood | Real charred wood | Real wood, finished at the plant | Printed image |
| Material cost | Low | High | Medium to high | Low |
| Labour | Char and seal on site or in a workshop | Char, seal, lay board by board | Lay and finish only | Lay only |
| Wear depth | Thin face; the finish carries the wear | Deep, can be re-charred | Wear layer of the board | Printed layer |
| Refinishing | Screen and recoat | Full sand and re-char | Limited sanding | None |
| Water tolerance | By bond and finish | Good when sealed | Moderate | Good |
Burnt plywood is good value when the floor is part of the interior design and the room has moderate traffic. For a comparison of SPC, LVP, laminate and wood floors, see our guide what is SPC flooring, and for the wider picture, wood flooring types.
How do you install a burnt plywood floor?
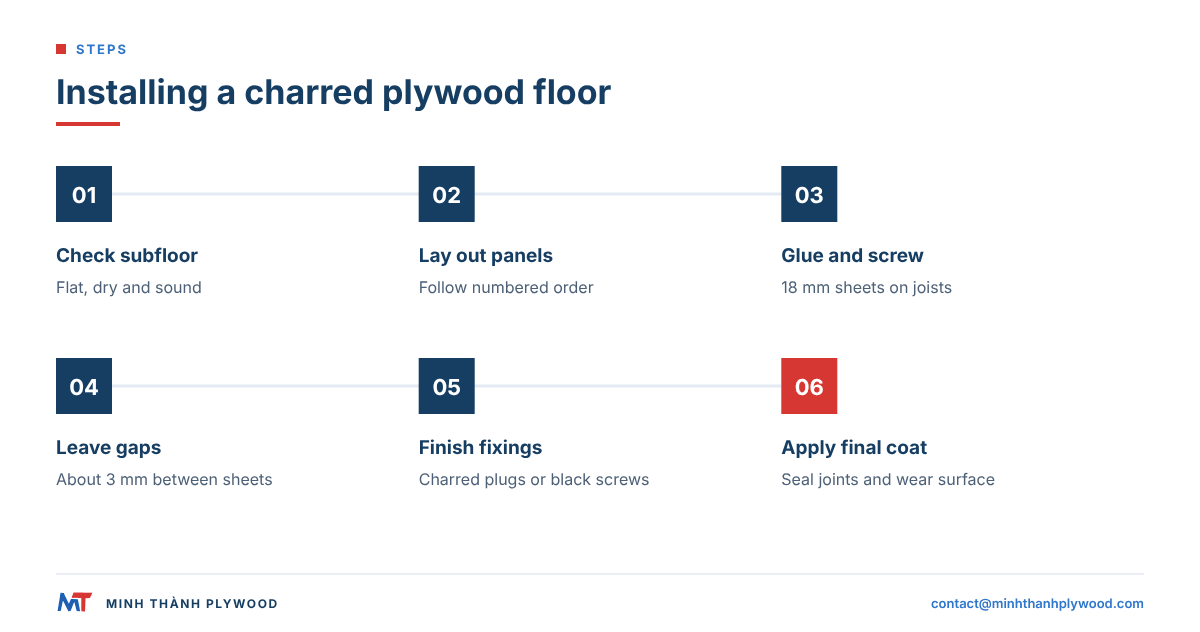
Install a burnt plywood floor like any finished plywood floor: on a flat, dry subfloor, with small gaps, glued and screwed, and the char already sealed. Only the touch-up coat is applied on site.
- Check the subfloor: flat, dry and sound; fill dips and screw down loose sheets.
- Lay out: place planks or sheets in their numbered order to balance tone.
- Fix: glue and screw planks over a subfloor, or lay 18 mm sheets on joists across the supports.
- Gap: leave about 3 mm between sheets and an expansion gap at the walls.
- Plug: counterbore screws and cover with charred plugs, or use visible black screws as a detail.
- Final coat: a last coat of the wear finish over the whole floor seals the joints.
For floor panel thickness by joist spacing, see the plywood flooring guide. For stairs, the plywood stair treads guide covers nosings and thickness.
How is a burnt plywood floor maintained?
A burnt plywood floor is maintained like any lacquered or oiled wood floor: dry cleaning, a damp mop, felt pads under furniture and a fresh wear coat before the finish wears through.
- Daily: sweep or vacuum with a soft brush head.
- Weekly: a damp mop with a cleaner made for the finish used.
- Scratches in the char: touch up with a dark wax stick or a small torch pass on a test piece first, then reseal.
- Every few years: screen and recoat traffic lanes before the finish wears through to bare char.
Keep a few spare charred offcuts from the original batch for repairs, so the tone matches.
What this means for your order
For a burnt plywood floor, order a sanded natural-veneer face with an A/B or B/B grade, a solid core, a bond for the room and a thickness for the floor build. Write the order like this:
| What to specify | Burnt floor example |
|---|---|
| Application | Finished floor, charred and sealed, over a plywood subfloor |
| Face/back | Pine A/B, sanded |
| Core | White Styrax, stitched, no open voids |
| Thickness and tolerance | 15 mm, ±0.2–0.3 mm |
| Bond and emission | UF glue at E0 emission |
| Moisture | 8–12% at dispatch |
| Size | 1220 × 2440 mm |
| Packing and quantity | Export pallets with corner guards; mixed in a 40HC with other lines |
Ask for a free sample, char an offcut with your crew’s torch, and approve that sample before the full order. The approved sample then fixes face grade and colour for production.
How does Minh Thanh Plywood supply panels for charred floors?
Minh Thanh Plywood supplies sanded pine, eucalyptus, birch, poplar and okoume-faced panels from 3 to 40 mm, pressed twice for a flat face, from our factory in Ha Hoa, Phu Tho.
- Faces: 10+ face veneers, graded as face/back pairs and matched to the approved sample.
- Sizes: 1220 × 2440 mm and 1250 × 2500 mm, plus custom sizes; panels cut into 4, 6 or 8 pieces on order.
- Load: one 40HC of 18 mm Styrax-core sheets is 990 sheets at about 26.8 kg each; mixed specifications by agreement.
- Terms: production 15–45 days after the 30% deposit; FOB Hai Phong, CFR or CIF.
Flooring brands, distributors and fit-out contractors who char panels in their own workshops can start from a free sample. Send your floor plan and the look you want through the pine plywood page, or see our exterior plywood for outdoor charred cladding.
Buyer questions, answered
What is a burnt plywood floor?
A burnt plywood floor is a plywood floor whose face has been scorched with a torch, brushed and sealed, so the grain stands out dark against lighter wood. It is the shou sugi ban look made from sheet material.
Can you torch plywood?
Yes, lightly. A propane torch moved steadily over a sanded plywood face chars the surface without burning through. Heavy or slow torching burns through the thin face veneer and can damage the glue line below.
Which plywood is best for burnt floors?
Pine-faced plywood gives the strongest grain after charring and brushing, and eucalyptus gives a dense, even dark tone. Birch chars smoothly with little texture; plain poplar faces char fast and look flat.
How do you seal a burnt plywood floor?
Brush and wipe off all loose soot, then apply a penetrating oil or a sealer coat, followed by two or three coats of a floor-rated polyurethane or hard-wax oil. The first coat locks in the char so it does not rub off on feet.
Does burning plywood cause delamination?
Light, even charring does not. Delamination comes from holding the flame in one place: the heat burns through the face veneer and reaches the glue line. Move the torch steadily and keep the char on the surface.
How thick should plywood be for a burnt floor?
Use 18 mm or more for a floor laid directly on joists, and 12–15 mm for a finished floor screwed over an existing subfloor. Thickness is chosen for the floor, not the char.
Is burnt plywood flooring durable?
Yes, once sealed with a floor-rated finish. The finish carries the wear, so traffic lanes need a screen and recoat every few years, the same as any finished plywood floor.
Can burnt plywood be used outdoors?
Charred plywood is used for outdoor cladding with an exterior phenolic (WBP) bond, but outdoor floors and decks need a deck-rated board. Indoors, burnt plywood is a floor, wall or ceiling finish.
Can you char plywood that is already installed?
Charring panels before installation, outdoors or in a ventilated workshop, is safer and gives a more even result. Torching an installed floor inside a building is a fire risk and leaves soot in the room.
Does charred plywood smell?
Freshly charred wood smells of smoke for a few days. Brushing, wiping and sealing remove most of it; a fully cured floor finish holds the rest.
What are good burnt plywood floor ideas?
Full-sheet grids with black screws, ripped plank layouts, herringbone from strips, a light toast under white oil, a black char with satin polyurethane, a two-tone border, and a charred wall matching the floor are the looks used most in cafés, shops and homes.