
Cutting plywood with a circular saw cleanly takes four things: a sharp 40 to 60 tooth blade, the good face down, the sheet supported on both sides of the line, and a straight guide clamped in place. Score or tape the line for veneer faces. Minh Thanh Plywood sets out the method for seven tools, the face-up rule for each, and why the core decides tear-out.
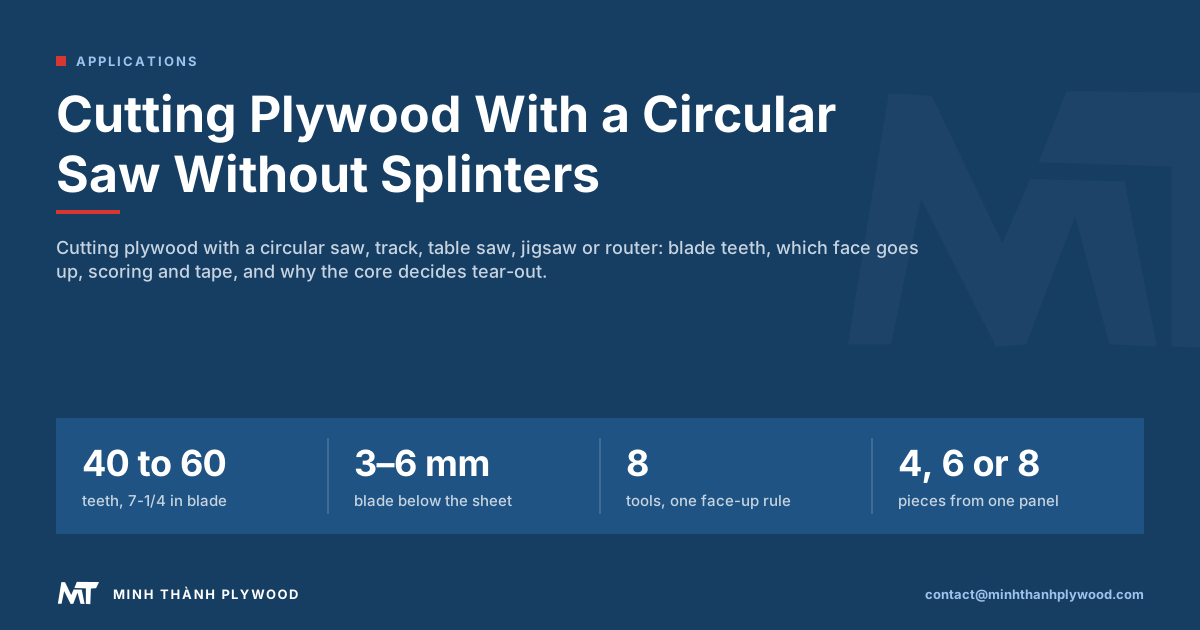
Cutting plywood with a circular saw in nine steps
Cutting plywood with a circular saw cleanly is a nine-step job: choose the blade, mark the line on the back face, support the sheet, set the depth, clamp a guide and cut at a steady speed. Each step removes one cause of splintering or a wandering line.
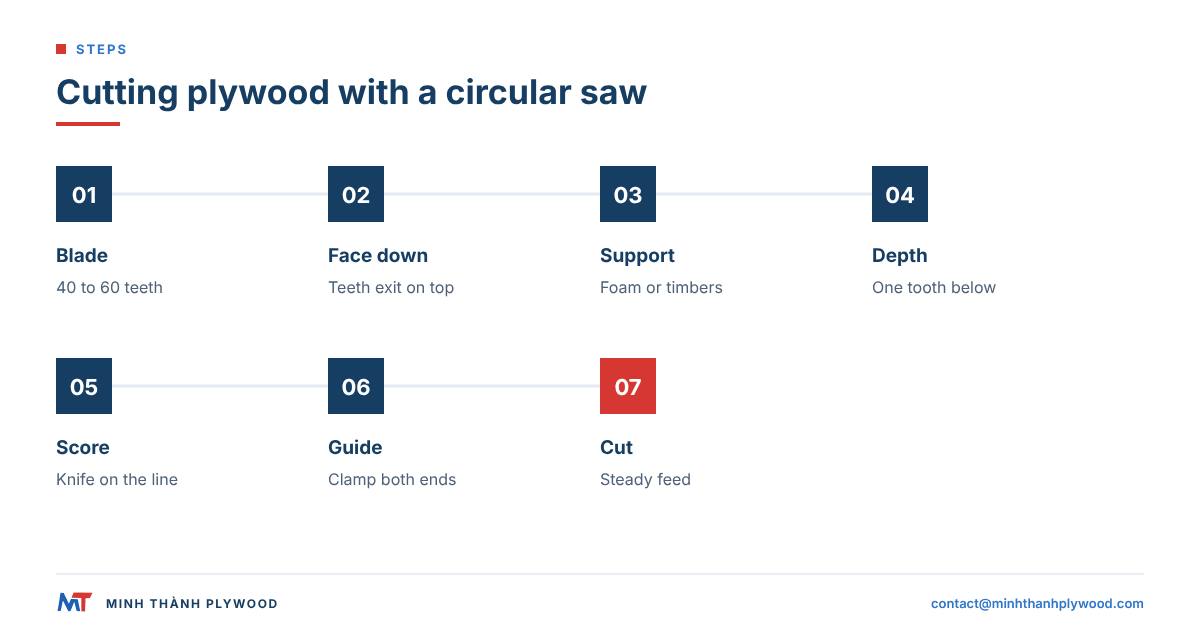
- Fit a sharp plywood blade. 40 to 60 teeth on a 7-1/4 in (184 mm) blade for general work; more teeth for veneered and melamine faces.
- Put the good face down. The blade cuts upward, so the bench-side face stays clean.
- Mark the line on the back face. Measure twice from the same reference edge and mark both ends of the cut.
- Support the whole sheet. Lay it on rigid foam insulation, or on four or more timbers placed so both sides of the line stay supported.
- Set the depth. About one tooth, or 3–6 mm, below the sheet.
- Score the line. Run a sharp knife along it twice on the face where the teeth exit.
- Clamp a straight guide. Offset it from the line by the distance from the blade to the edge of the base plate.
- Cut at a steady feed. Let the saw reach full speed before it enters, keep the base flat and do not stop halfway.
- Check the edge. Run a fingertip along both faces: a clean cut feels smooth on the face that matters.
The rest of this guide explains each step, the same job with six other tools, and the build of the panel that makes clean cutting easy or hard.
Which side of plywood faces up when cutting?
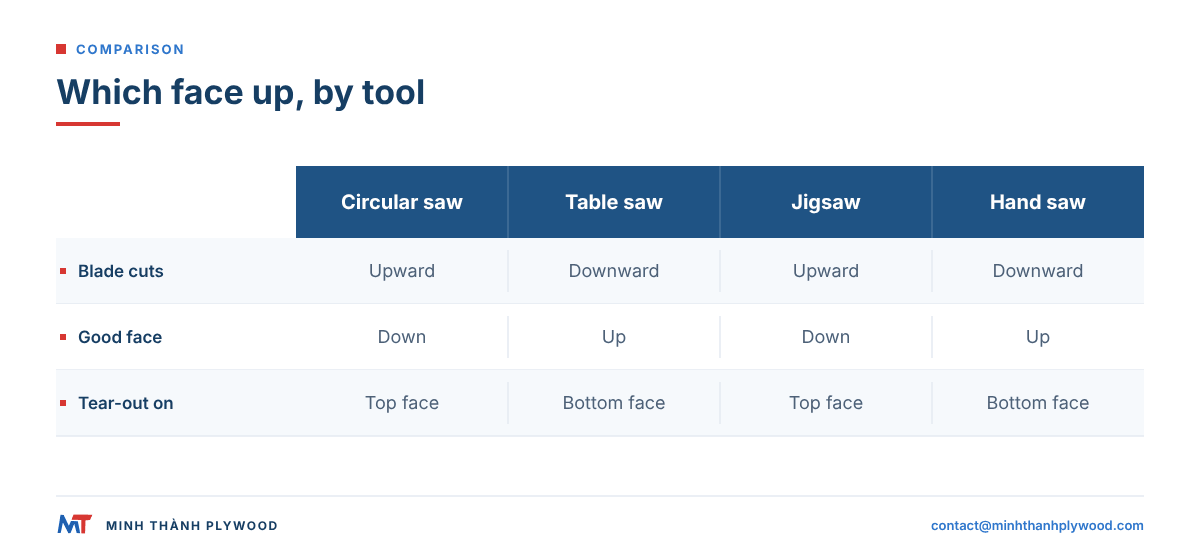
The face that should stay clean goes on the side where the teeth enter the wood: down for a circular saw, a track saw without a splinter strip and a standard jigsaw blade; up for a table saw, a mitre saw, a band saw and a hand saw. Tear-out happens where the teeth leave the sheet.
| Tool | Blade direction at the cut | Good face | Why |
|---|---|---|---|
| Circular saw | Upward | Down | Teeth exit through the top face |
| Track saw with splinter strip | Upward | Up or down | The strip holds the fibres on the track side |
| Table saw | Downward | Up | Teeth exit through the bottom face |
| Mitre or chop saw | Downward | Up | Blade comes down into the top face |
| Jigsaw, standard blade | Upward on the pull stroke | Down | Teeth lift the top fibres |
| Jigsaw, down-cut blade | Downward | Up | Teeth push the top fibres down |
| Hand saw, Western push stroke | Downward | Up | Teeth cut on the push and exit below |
| Router, down-cut spiral bit | Downward | Up | Flutes press the top face into the sheet |
When both faces show, as on a shelf or a cabinet side, protect the exit face with a scored line, tape or a backer board. For finished parts the exit face also decides which side gets the clear finish or paint, so mark the faces before the first cut.
Why plywood splinters and tears out
Plywood splinters because the face veneer is thin and its fibres run in one direction: where a tooth leaves the sheet, it lifts fibres that have nothing behind them to hold them down. Cuts across the face grain tear more than cuts along it.
Five causes account for almost all plywood tearout:
- Exit side. The good face is on the side where the teeth leave the wood.
- Blade. Too few teeth, a blunt edge or a grind made for ripping solid timber.
- Support. The offcut sags, the kerf closes and the blade binds and chatters.
- Feed. Pushing too fast, especially across the grain, or stopping and restarting mid-cut.
- Panel build. A brittle or very thin face, or a void in the core under the face.
The first four are about the saw and the person using it. The fifth is decided at the mill, before the sheet reaches the workshop.
How the panel build decides tear-out: face veneer and core voids
A clean cut needs a face veneer that is fully bonded to a closed core: where a core veneer has a gap, the face above it has no support and breaks out as the teeth pass. A sharp blade cannot fix a hollow panel.
What happens at the mill shows up at the saw:
- Core gaps. Gaps between core veneers leave the face bridging an empty slot. Minh Thanh stitches core layers both horizontally and vertically to keep the core closed.
- Flatness. A bowed sheet lifts off the bench and the blade height changes along the cut. Furniture-grade panels are pressed twice as standard: the core board is pressed and calibrated, then face and back are pressed on.
- Thickness. Sanded furniture panels are held to ±0.2–0.3 mm, down to ±0.2 mm, so a groove or a dado set for one sheet fits the next.
- Face sanding. Faces are sanded and polished. An over-sanded face is thinner and splinters more easily.
| What you see on the cut edge | Usual cause | Saw fix or panel fix |
|---|---|---|
| Ragged fibres along the exit face | Exit side, blade, feed | Swap the face, finer blade, slower feed |
| Chips at the end of a cross-cut | Unsupported exit at the edge | Backer board or score the last few cm |
| A dark slot in the edge and a broken face above it | Core gap | Panel build: closed, stitched core |
| Burn marks and a wavy line | Blunt blade or binding offcut | Sharpen, support the offcut |
| Steps or a changing depth along the cut | Bowed sheet | Flat, calibrated panel |
Best blade for cutting plywood: teeth, grind and kerf
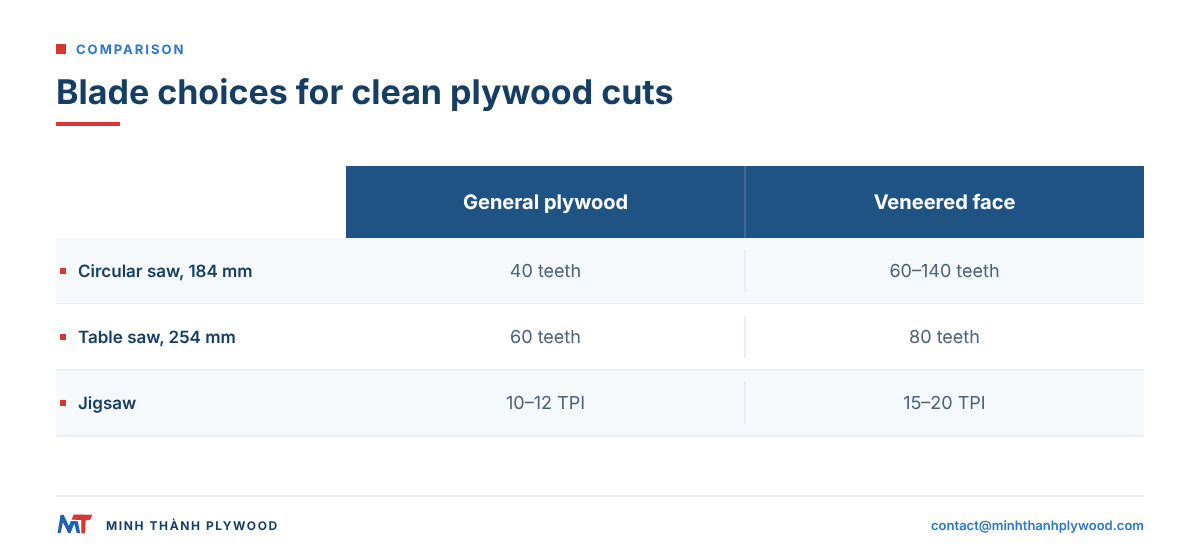
The best blade for cutting plywood has many small teeth, an alternate top bevel (ATB) grind and a thin kerf: 40 to 60 teeth on a 7-1/4 in circular saw blade and 60 to 80 on a 10 in table saw blade. More teeth mean smaller bites and less force on the face fibres.
| Tool and blade size | Teeth for general plywood | Teeth for veneered or melamine faces | Grind |
|---|---|---|---|
| Circular saw, 7-1/4 in (184 mm) | 40 | 60 to 140 | ATB or Hi-ATB |
| Track saw, 160 mm class | 48 | 48 fine or more | ATB |
| Table saw, 10 in (254 mm) | 60 | 80 | Hi-ATB; TCG for laminate faces |
| Mitre saw, 10 in or 12 in | 60 | 80 to 100 | ATB |
| Jigsaw | 10 to 12 TPI | 15 to 20 TPI, down-cut | Ground, side-set |
| Hand saw | 10 to 12 TPI | 12 or more TPI | Cross-cut |
Three rules follow from the table:
- Teeth. A 24-tooth framing blade is built for fast rip cuts in timber and tears plywood faces.
- Grind. ATB teeth slice the face fibres like a knife; a triple chip grind (TCG) is better on hard laminate and melamine faces.
- Sharpness. A blunt fine blade cuts worse than a sharp coarse one. Replace or resharpen when the saw needs more push or the cut starts to burn.
The best circular saw blade for cutting plywood is therefore a sharp 40 to 60 tooth ATB blade for everyday sheets and a 60 tooth or finer plywood blade for faces that will be clear-finished.
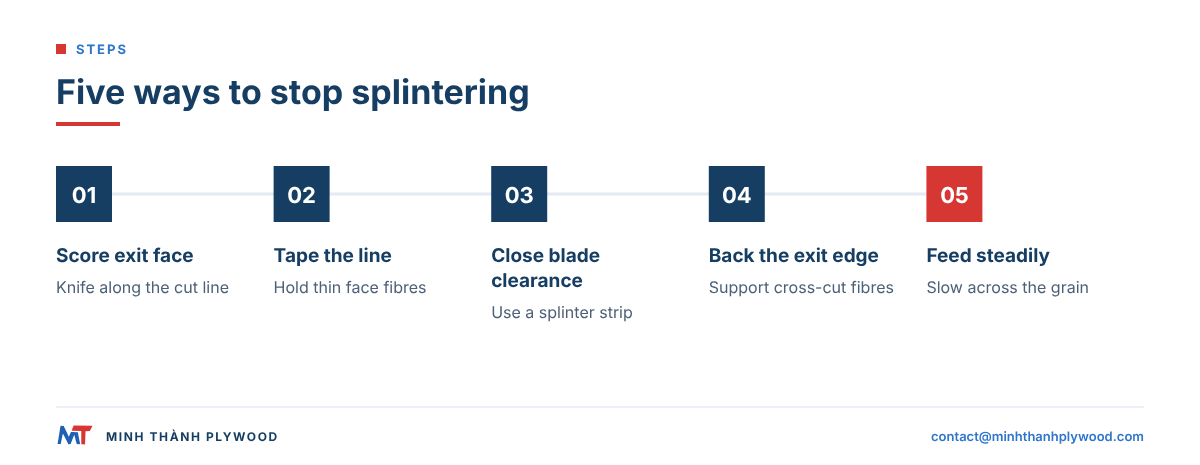
How to cut plywood without splintering: five methods
To cut plywood without splintering, combine the right face orientation with one or more of five methods: scoring, tape, a zero-clearance surface, a backer board and a slow, steady feed. Scoring is the most effective on veneer faces.
- Score the line. Draw a sharp utility knife along a straight edge two or three times on the exit face. The cut fibres can no longer lift past the line.
- Tape the line. Run painter’s tape along the cut and mark on the tape. It holds the face fibres on brittle or very thin veneers; peel it off away from the cut edge.
- Use a zero-clearance surface. A splinter strip on a track, a zero-clearance insert in a table saw or a sacrificial base on a circular saw closes the gap beside the blade.
- Back the exit side. On cross-cuts, clamp an offcut under or behind the exit end so the last fibres are supported.
- Feed slowly across the grain. Cross-grain cuts tear more than rip cuts, so slow down and keep moving without stopping.
On a cut where both faces will show, score both faces or use a two-pass method: a shallow scoring pass of 3–6 mm, then the full-depth pass along the same line.
How to cut a plywood sheet straight without a table saw
To cut plywood straight without a table saw, clamp a straight guide to the sheet and run the saw’s base plate along it; the guide, not your hand, keeps the line. A factory edge of another sheet, an aluminium level or a homemade guide board all work.
A homemade guide board is the most accurate for repeat cuts:
- Glue and screw a straight strip of plywood onto a wider base of thin plywood, factory edge out.
- Run the circular saw along the strip once, trimming the base to the exact blade line.
- To cut, lay the trimmed edge of the base on your pencil line and clamp both ends.
- Cut with the base plate held against the strip from start to finish.
Two habits keep the line straight:
- Clamp at both ends and check that the guide has not moved before the cut.
- Push from behind so the saw is not pulled away from the guide as the cut gets longer.
A track saw does the same job with a guide rail and a splinter strip in one tool, and it is the closest thing to a panel saw on site.
How to cut a full sheet of plywood by yourself
To cut a full sheet of plywood by yourself, lay it flat on a sheet of rigid foam insulation on the floor and cut through the plywood into the foam. Both parts stay supported, nothing falls and the blade never pinches.
A full 1220 × 2440 × 18 mm sheet weighs about 26.8 kg on a Styrax core, 31.1 kg on an Acacia core and 34.8 kg on a Eucalyptus core. That is heavy and wide for one person on a pair of trestles, which is why the floor method is safer.
- Lay the foam on a clean, flat floor.
- Slide the sheet on top, good face down for a circular saw.
- Mark and clamp the guide.
- Set the depth so the blade passes the plywood and only grazes the foam.
- Kneel on the sheet behind the saw, not on the offcut side, and cut.
Break the sheet down into smaller parts first and do the precise cuts later on a table saw or with a track, where accuracy is easier to hold.
How to cut a plywood sheet on a table saw
On a table saw, put the good face up, set the blade about one tooth above the sheet, support the outfeed and use the fence for rip cuts and a sled or mitre gauge for cross-cuts. A full sheet needs a helper or an outfeed table.
Steps for clean table saw cuts:
- Fit a 60 to 80 tooth blade and a zero-clearance insert.
- Set the blade height to one tooth above the top face.
- Support the sheet at the infeed and outfeed so it stays flat on the table.
- Keep the reference edge against the fence for the full length of a rip cut.
- Use a riving knife so the kerf cannot close on the blade.
- Cross-cut on a sled for parts that must be square.
Ply cutting on a table saw is most accurate when the sheets are flat and of even thickness. A bowed panel lifts off the table and the cut wanders; a panel with a thickness spread fits grooves unevenly.
Jigsaw, hand saw and router: curves, short cuts and openings
A jigsaw cuts curves and openings, a hand saw makes short cuts where there is no power, and a router trims edges and cuts grooves; each needs its own face rule and blade. None of them should be the first choice for long straight cuts in a full sheet.
- Jigsaw. Fit a fine blade of 10 to 20 TPI. With a standard up-cut blade put the good face down; a down-cut or reverse-tooth blade lets you keep it up. Turn off the pendulum action, keep the shoe flat and cut just outside the line.
- Hand saw. Use a fine cross-cut saw of 10 to 12 TPI with the good face up, at a low angle to the sheet. Score the line first and support the offcut near the end.
- Router. A down-cut spiral bit leaves the top face clean, an up-cut bit the bottom, and a compression bit both. Take shallow passes and climb-cut the last few millimetres on veneer faces to stop chipping at the corners.
For an opening such as a sink cut-out, drill a hole in each corner first and join the holes with the jigsaw. The round corners stop cracks from running into the sheet.
Ply cutting by tool: the summary table
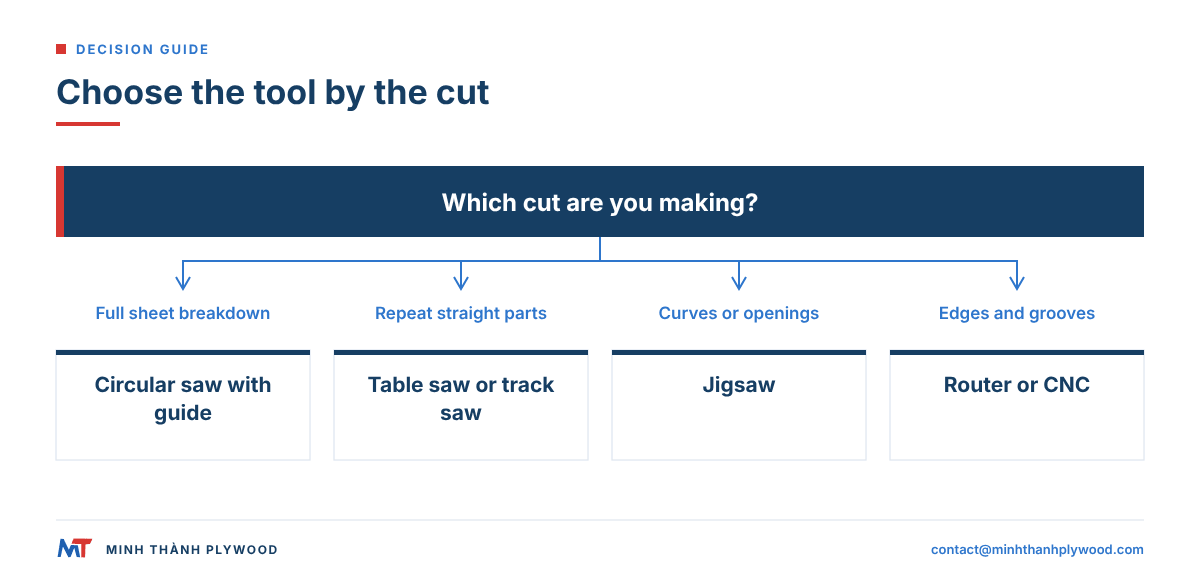
Each tool has one job it does best in plywood: the track saw and table saw for straight cuts, the circular saw for breaking down sheets, the jigsaw for curves and the router for edges. Choose by the cut, not by what is in the van.
| Tool | Best for | Good face | Blade or bit | Typical accuracy |
|---|---|---|---|---|
| Circular saw with guide | Breaking down full sheets | Down | 40 to 60 teeth ATB | Good with a clamped guide |
| Track saw | Finish cuts on site | Up, with splinter strip | 48 teeth fine | Very good |
| Table saw | Rip cuts and repeat parts | Up | 60 to 80 teeth Hi-ATB | Very good |
| Mitre saw | Short cross-cuts on strips | Up | 60 to 100 teeth | Good on narrow parts |
| Jigsaw | Curves and cut-outs | Down for standard blades | 10 to 20 TPI | Fair, finish by sanding |
| Hand saw | Short cuts with no power | Up | 10 to 12 TPI | Fair |
| Router or CNC | Edges, grooves, nested parts | Both, with compression bit | Spiral bit | Very good |
What is the best way to cut plywood for cabinet and furniture parts?
The best way to cut plywood for cabinet and furniture parts is to break the sheet down on a circular or track saw, then cut every part to final size on one table saw or CNC with one fence setting per size. Parts cut in one set-up match each other.
- Draw a cutting list with every part, its grain direction and its face.
- Plan the layout on the full sheet, 1220 × 2440 mm or 1250 × 2500 mm, with a kerf allowance between parts.
- Break down the sheet into oversize blanks about 10 to 20 mm bigger than the parts.
- Cut to final size on the table saw or CNC, all parts of one size before changing the fence.
- Band or finish the edges as the design needs; the plywood edge banding guide covers tape, solid lipping and the edge left on show.
For plywood kitchen cabinets and furniture panels, the grain on doors and drawer fronts should run the same way across a run of parts. Mark it on the cutting list before the first cut, not afterwards.
Cutting birch, veneered and film-faced plywood
Thin or decorative faces need a fine-tooth blade and full support: birch, engineered veneer (EV) and poplar faces chip easily across the grain, and hard film or melamine faces chip at the exit side. Score, tape or use a zero-clearance surface on all of them.
| Face | What goes wrong | What works |
|---|---|---|
| Birch | Chips across the grain on the exit face | 60 tooth or finer ATB, score both faces |
| Engineered veneer (EV) | Splinters on thin faces | Tape the line, slow feed |
| Poplar or Pine | Soft fibres lift and fuzz | Sharp blade, backer board on cross-cuts |
| Film-faced | Film chips on the exit side | TCG blade, scoring pass, seal the cut edges |
| Thin plywood 3–6 mm | Sheet flutters, edges break | Full support, knife cut for 3 mm |
Thin plywood of 3–5 mm at Minh Thanh is always 5-ply, so even the 3 mm panel has two face veneers over three inner veneers. A 3 mm sheet can be cut with a sharp utility knife: several light passes along a straight edge, then snap and clean the edge.
After cutting film-faced or exterior panels, seal the cut edges with a paint or edge sealer. The film protects the face, and the fresh edge is where water gets in.
Plywood cutting safety and dust
Cut plywood with eye protection, hearing protection and a dust mask or extraction, and with both hands on a saw whose guard works. Kickback, flying chips and fine dust are the three hazards.
- Kickback happens when the kerf closes on the blade. Support both sides of the line, use a riving knife on a table saw and never stand directly behind the blade.
- Chips fly from the exit side. Wear safety glasses even for one short cut; OSHA’s eye and face protection standard 1910.133 requires them where flying particles are a hazard.
- Dust from sawing is fine wood dust mixed with cured glue. Connect extraction to the saw or wear a dust mask rated for fine dust, and clean up with a vacuum rather than a broom.
- Noise from a circular saw or table saw is loud enough to damage hearing over a day. Wear ear defenders; OSHA’s occupational noise exposure standard 1910.95 sets the workplace limits.
Minh Thanh furniture plywood uses UF glue at E0 emission, and its six ASTM D6007 chamber tests between April 2025 and June 2026 averaged 0.014–0.032 ppm against the 0.05 ppm limit. That limit for veneer-core hardwood plywood is set in 40 CFR 770.10. That covers the panel; extraction and a mask still protect against the dust.
Cut-to-size plywood from the mill: when it beats cutting on site
Cut-to-size from the mill beats cutting on site when an order repeats the same parts in volume: every piece is cut on a panel saw to one size and one square, and the workshop saves the time and the waste. Minh Thanh cuts one panel into 4, 6 or 8 pieces for export orders.
When cut-to-size makes sense:
- Repeat parts. Shelves, drawer bottoms, cabinet backs and box sides in fixed sizes.
- Limited workshop space. No room to handle full sheets.
- Packing and logistics. Smaller pieces pack tighter and handle more easily on arrival.
Cut-to-size plywood is shipped regularly to Italy and other European markets. It is made from the same panels as the full sheets: double-pressed, sanded and held to the same thickness tolerance. The cut-to-size plywood page lists the formats.
What this means for your order
If your plant or your customers cut the panels, order a build that cuts cleanly: a closed, stitched core, a face grade that suits the finish, a flat double-pressed panel and a tight thickness tolerance. A furniture plywood line written for clean cutting reads:
18 mm furniture plywood, white Styrax core stitched both ways, pressed twice, UF glue at E0 emission, birch D+/D faces sanded, 1220 × 2440 mm, thickness ±0.2–0.3 mm; or cut to size, one panel into 4 pieces; 1×40HC.
Start with free samples and cut them with your own saws and blades before you order. Minh Thanh’s minimum order is one 40HC, with production 15–45 days after the 30% deposit. Send the specification or your cutting list, and we quote furniture plywood in full sheets or cut to size. More application guides are in plywood applications, including plywood wall panels.
Buyer questions, answered
Which side of plywood faces up when cutting with a circular saw?
The good face goes down. A circular saw blade cuts upward, so the teeth exit through the top face and any splinters appear there, leaving the face on the bench side clean.
Which side of plywood faces up on a table saw?
The good face goes up. A table saw blade cuts downward into the top face and exits underneath, so the bottom face takes any tear-out.
What is the best blade for cutting plywood?
A thin-kerf blade with many small teeth and an alternate top bevel grind: 40 to 60 teeth on a 7-1/4 in circular saw, 60 to 80 on a 10 in table saw. For veneered or melamine faces, a dedicated plywood blade with more teeth gives the cleanest edge.
How do you cut plywood without splintering?
Use a sharp fine-tooth blade, put the good face where the teeth enter, support the sheet on both sides of the cut, score the line with a knife and run a steady feed. Painter's tape along the line helps on thin or brittle faces.
How do you cut plywood straight without a table saw?
Clamp a straight edge or a track to the sheet, offset from the line by the distance between the blade and the edge of the saw's base plate, and run the saw along it on a fully supported sheet.
Why does my plywood splinter even with a fine blade?
Usually the face is on the wrong side for the tool, the offcut is sagging and pinching the blade, the feed is too fast across the grain, or the face veneer sits over a void in the core with nothing behind it.
How do I cut a full sheet of plywood by myself?
Lay the sheet on a sheet of rigid foam insulation on the floor, clamp a guide and cut with the blade set just through the plywood. The foam supports both sides, so neither part drops or pinches the blade.
How deep should the circular saw blade be set for plywood?
Set the blade so it projects about one tooth, or 3–6 mm, below the sheet. A shallow blade cuts with more teeth in the wood, which leaves a cleaner face and lowers the risk of kickback.
Can I cut plywood with a jigsaw?
Yes, for curves and short cuts. Use a fine, down-cut or reverse-tooth blade, put the good face down for a standard up-cut blade, and keep the shoe flat on the sheet.
Is it better to buy plywood cut to size?
For repeated parts, yes. A mill or panel saw cuts every part to the same size with clean edges; Minh Thanh cuts one panel into 4, 6 or 8 pieces for export orders.
What router bit cuts plywood cleanly on both faces?
A compression spiral bit. Its lower flutes cut upward and its upper flutes cut downward, so both faces of the sheet are pressed inward and stay clean.