
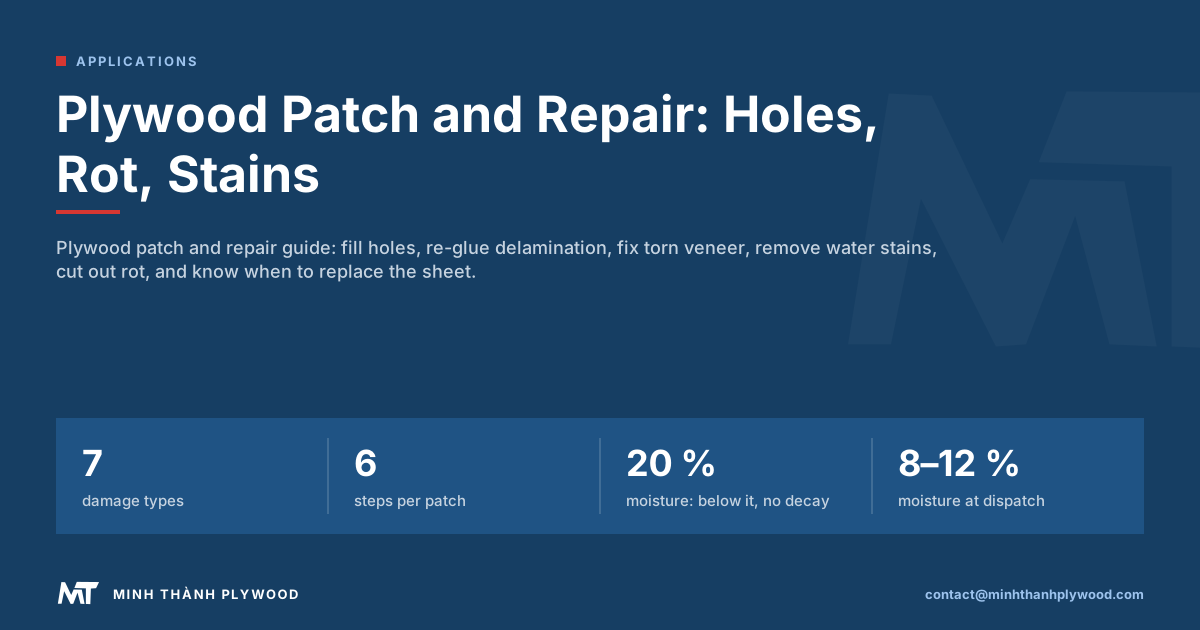
A plywood patch is the right repair for a hole, a dent or a small area of rot: cut back to sound wood, glue in a matching piece or filler, then seal. Delamination is re-glued and clamped, torn veneer is glued down or replaced, and water stains come out with oxalic acid. Minh Thanh Plywood, a Vietnamese plywood manufacturer, sets out each repair and when replacing the sheet is cheaper.
Plywood repair: match the method to the damage
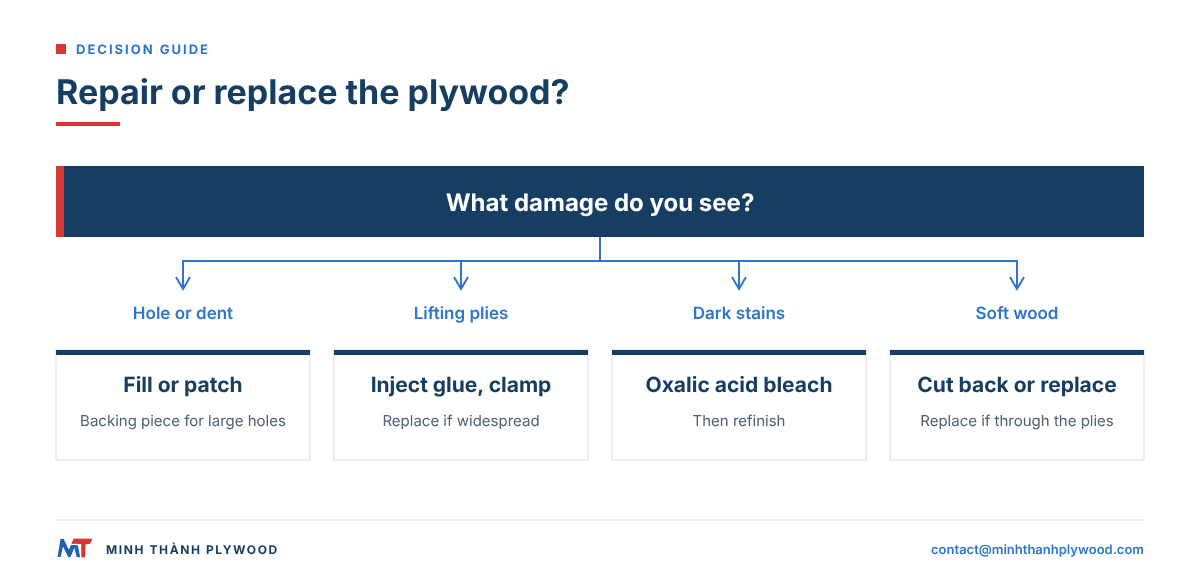
Plywood repair starts with the type of damage: holes and dents are filled or patched, delamination is re-glued, torn veneer is glued or replaced, stains are bleached, and rot is cut out and patched. Most repairs take less than an hour of work plus the cure time of the glue or filler.
The matrix gives the method for each damage and the point at which a new sheet is the better answer.
| Damage | What you see | Repair | Replace the sheet when |
|---|---|---|---|
| Small hole or dent | Screw hole, impact dent | Wood or epoxy filler, sand, seal | Never for this alone |
| Large hole | Hole larger than a coin, broken face | Plywood patch or dutchman with backing | The hole spans a joist bay on a floor |
| Delamination | Bubble, lifting face, separated plies | Inject glue, clamp, cure | The separation covers a large area |
| Torn veneer | Lifted flap, missing chip | Glue down or inlay new veneer | The face is torn over most of the sheet |
| Water stain | Dark grey or black marks | Oxalic acid bleach, refinish | The wood under the stain is soft |
| Surface rot | Soft fibres at an edge or corner | Cut back, harden, fill or patch | Rot goes through several plies |
| Swollen edge | Raised, rough edge | Dry, sand back, seal | Swelling spreads into the face |
Always find and stop the cause first. A repair on a floor that is still wet, or a roof that still leaks, fails within a season.
Floor patch over a plywood subfloor: which patch for which hole?
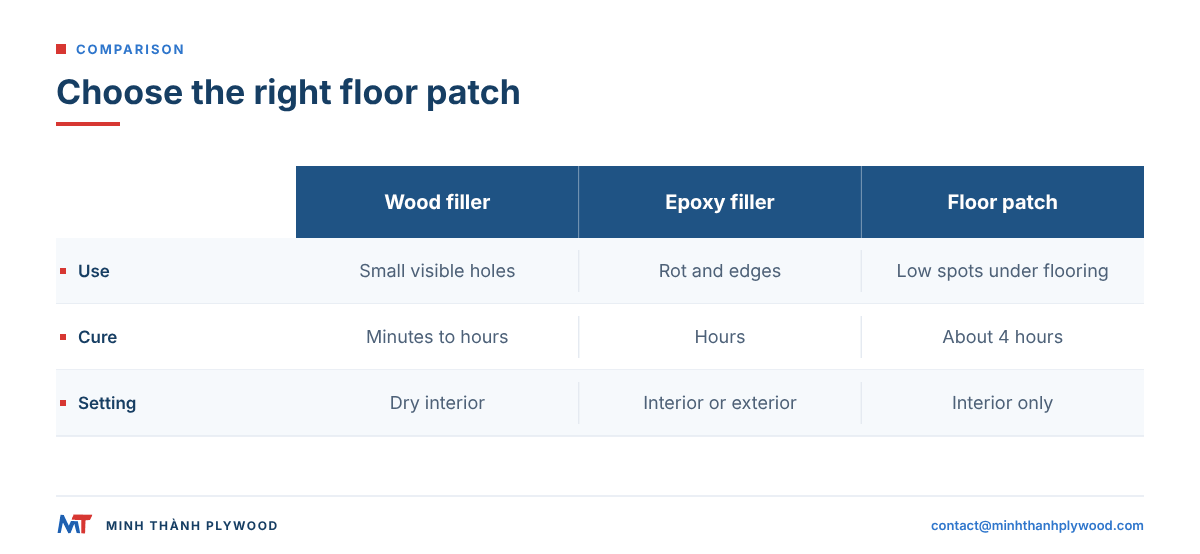
For dents, screw heads and shallow low spots in a plywood subfloor, use a pre-mixed floor patch; for a hole through the sheet, cut in a plywood patch; for a small hole in a visible wood face, use wood filler. A floor patch is a cement or acrylic compound that feather-finishes flat under vinyl, LVT or tile, so it is the wrong product for a bare wood finish and the wrong one for a hole that goes through the panel. A wrong pick shows as a ridge or a crack through new flooring.
| Product class (cure times from filler reviews) | Best for | Cure and sanding | Interior or exterior | Price band |
|---|---|---|---|---|
| Wood filler (latex or solvent) | Nail holes, small dents in a visible face | Dries in minutes to hours; sands easily | Interior, or exterior-grade types | Low |
| Two-part epoxy filler | Rot repair, structural fills, edges | Hours; sands once hard; no shrink | Interior and exterior | Highest per pint |
| Polyester filler (Bondo type) | Large cosmetic fills and corners | Sandable in about 15 to 30 minutes | Mainly interior or painted work | Mid |
| Pre-mixed floor patch | Low spots and screw heads under flooring | About 4 hours; sands and primes | Interior only | Low to mid |
How to use a floor patch on plywood:
- Screw the subfloor first. Fix any loose or squeaking sheet to the joists so nothing flexes; a patch cracks over a floor that moves.
- Clean and dampen. Sweep, scrape the high spots, and lightly damp the area to be patched with clean water.
- Fill in thin coats. Trowel the patch on and feather the edges to zero. A fill deeper than 1/4 in (6 mm) goes in two or more coats, per the maker’s data sheet.
- Cure, sand and prime. Wait about 4 hours, sand flat and prime before vinyl, LVT or tile goes down.
One quart of a pre-mixed floor patch covers up to 15 sq ft (about 1.4 m²) at feather thickness, so a few quarts handle a room of screw heads and seams; a gallon suits a full-room skim. Plywood that has gone soft or rotted is cut out and patched, as in the sections below, not skimmed over.
How to patch plywood: small holes and dents
To patch plywood with a small hole or dent, clean the damage, fill it slightly proud with a two-part filler, sand it flush and seal it. This covers screw holes, nail holes, knots that have fallen out and impact dents.
- Clean the area. Remove loose fibres, dust and old finish with a chisel or sandpaper.
- Dry it. The wood must be dry before filling; a damp repair does not bond.
- Choose the filler. Use two-part epoxy filler outdoors and in wet areas; a wood filler is enough on dry interior panels.
- Fill proud. Press the filler in firmly and leave it a little above the surface, because it can sink as it cures.
- Sand flush. Sand with a block, finishing with fine paper, so the repair is level with the face.
- Seal and finish. Prime and paint, or stain to match, and seal over the repair.
For a painted panel, a filled repair disappears. For a clear-finished panel, a matching veneer inlay looks better than filler, see the veneer repair below.
Plywood patch for a large hole
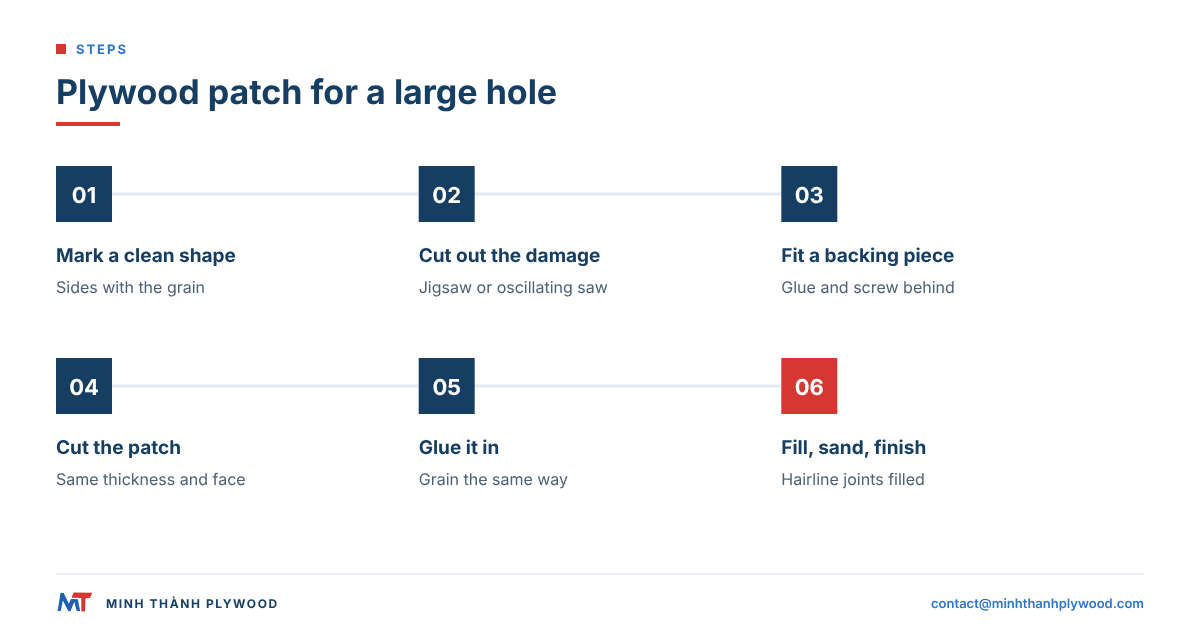
A plywood patch for a large hole is a clean-cut square or rectangle of new plywood glued into the opening, with a backing piece behind it. The backing carries the patch and holds it level with the face.
- Mark a clean shape. Draw a square or rectangle around the damage, a little larger than the broken area, with the sides parallel to the face grain.
- Cut out the damage. Drill a starting hole in each corner and cut along the lines with a jigsaw or an oscillating saw.
- Fit a backing piece. Cut a piece of plywood larger than the hole, push it through, and glue and screw it to the back of the sheet from the front.
- Cut the patch. Cut a piece of the same thickness and face species to fit the hole closely, with the grain running the same way.
- Glue in the patch. Glue the edges and the back, press the patch onto the backing and screw it if it will be hidden.
- Fill the joints. Fill the hairline joints with filler, sand flush and finish.
On a floor or a roof deck, a large hole between joists is a structural repair. Cut back to the centre of the nearest joists, fix noggins or blocking at the patch edges, and use the same thickness as the original sheet. Our plywood for subfloors guide gives the thickness for each joist spacing.
Dutchman repair for a clear-finished face
A dutchman is a shaped inlay of new wood that replaces a damaged area of a visible face. Furniture makers and boat builders use it when a filler would show through a clear finish.
- Cut the inlay first. Cut a diamond or boat shape from a matching veneer or offcut, with the grain lined up.
- Trace it. Lay the inlay over the damage and score round it with a sharp knife.
- Rout the recess. Remove wood inside the line to the inlay’s depth with a router or a sharp chisel.
- Glue it in. Glue the inlay, press it down with a caul and a clamp or weight, and leave it to cure.
- Level it. Pare and sand the inlay flush, taking care not to sand through the surrounding face.
Pointed shapes hide best, because the joint lines run along the grain instead of across it.
How to fix delaminated plywood
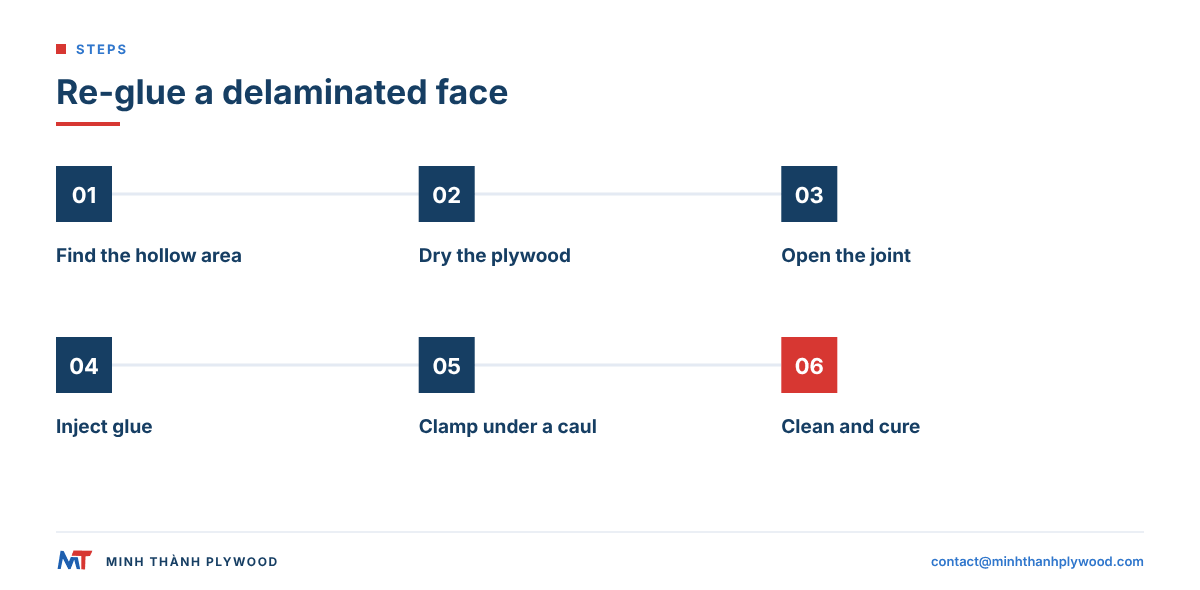
To fix delaminated plywood, dry the separated area, get a waterproof glue into the gap, press the layers back together under a flat caul and let the glue cure. Delamination shows as a bubble, a lifting face or plies that have separated at an edge.
- Find the edges of the bubble. Tap the face with a coin; a hollow sound marks the separated area.
- Dry it fully. Let the panel dry in a warm, ventilated place, or use a heat gun gently, until the wood is dry.
- Open the joint. At an edge, prise the plies apart a little with a thin blade; in the middle of a face, drill small holes into the bubble.
- Glue it. Inject epoxy or polyurethane glue with a syringe, or work it in with a thin blade.
- Clamp it flat. Lay a flat board over the area with plastic underneath, then clamp or weight it, or screw through and fill the holes later.
- Clean and cure. Wipe off squeezed-out glue and leave it for the full cure time.
Delamination on site almost always has a cause: water in an unsealed edge, a bond that does not suit the exposure, or heat behind a dark finish. Our article on plywood delamination explains how to tell the causes apart.
Repairing plywood veneer: tears, chips and lifted edges
Repairing plywood veneer means gluing a lifted piece back down or setting in a new piece of matching veneer. Face veneers are thin, so the repair is shallow and needs care when sanding.
- Lifted flap still attached: slide wood glue under it with a thin blade, press it down with a block and a clamp, and wipe off the excess.
- Chipped edge: glue on the chip if you have it; if not, fill with a two-part filler and shape it with a sanding block.
- Missing piece of face: cut the damaged area to a clean, pointed shape and inlay a piece of matching veneer, as for a dutchman.
- Bubble in the face veneer: slit the bubble along the grain with a knife, work glue under both halves and press flat.
Lay the grain of any new veneer the same way as the face. A patch with the grain at right angles shows clearly under paint and more so under clear finish.
How to remove water stains from plywood
To remove water stains from plywood, strip the finish off the stained area, apply oxalic acid wood bleach, rinse with clean water, let the panel dry and refinish. Oxalic acid lifts the dark grey and black marks caused by water reacting with iron and tannin in the wood.
- Remove the finish. Sand or strip the varnish or paint so the bleach can reach the wood.
- Mix the bleach. Dissolve oxalic acid crystals in warm water following the maker’s instructions; wear gloves and eye protection.
- Brush it on. Wet the whole stained area and a little beyond, so no tide mark forms.
- Let it work. Leave it until the stain fades, then repeat if needed.
- Rinse and neutralise. Wash the area with clean water, or with a borax or baking soda solution if the product calls for it.
- Dry and sand lightly. Let the panel dry completely, then sand the raised grain lightly with fine paper.
- Refinish. Seal with the original finish.
White rings in a varnished surface are a different problem: they sit in the finish, not in the wood, and often come out with gentle heat or a fine polishing compound.
How do you remove stains from plywood in Australia?
Remove stains from plywood in Australia with the same methods as anywhere else: oxalic acid for water and tannin stains, a mild detergent for dirt and mould, and light sanding with fine paper before refinishing. Oxalic acid is sold there as deck cleaner or wood bleach, and the same treatment works in Europe or North America.
Mould, dirt and grey weathering
Mould and dirt on plywood are cleaned off; grey weathering is a surface change that comes off with bleach and light sanding. Neither is structural unless the wood under them is soft.
- Mould spots: wash with a mild detergent solution, scrub with a soft brush, rinse and dry fully. Find and fix the damp that caused it. The US EPA’s cleanup guidance for hard surfaces is to scrub mould off with detergent and water and dry completely.
- Dirt and grease: wash with detergent, rinse and dry; use a degreaser on workshop floors.
- Grey weathering on outdoor plywood: apply oxalic acid wood bleach, rinse, dry, sand lightly and refinish with an exterior coating.
- Black spots under a clear finish: these are usually iron or tannin stains, treated as water stains above.
Clean and dry are the two conditions for any finish to bond. Our guide to finishing plywood covers the coatings to use afterwards.
Can rotted plywood be repaired?
Rotted plywood can be repaired when the rot is small and local: dry it, cut back to sound wood, harden the edges with a penetrating epoxy, then fill or patch. When rot has gone through several plies or spread across a floor, a deck or a roof bay, the sheet must be replaced.
Test before you decide. Push an awl or a screwdriver into the area: sound wood resists, rotten wood gives and comes out in short, soft fibres.
- Stop the water. Fix the leak, the blocked drain or the condensation that caused the rot.
- Dry the area. Wood decay fungi need wet wood; the US Forest Products Laboratory Wood Handbook (2010) notes that wood kept below about 20 % moisture content does not decay.
- Cut out soft wood. Remove everything soft with a chisel or an oscillating tool, back to firm wood.
- Harden the edges. Brush or inject a low-viscosity penetrating epoxy into the cut so it soaks into the fibres.
- Fill or patch. Fill shallow areas with epoxy filler; cut a clean opening and glue in a plywood patch for deeper ones.
- Seal. Prime, paint and seal the repair and every nearby edge.
A soft area on a floor or a roof is a safety question, not a cosmetic one. If the panel deflects under foot, replace it.
Swollen edges and edge sealing
A swollen plywood edge is dried, sanded or planed back flat and sealed; an edge that is not sealed swells again. Cut edges take up water far faster than faces, because the end grain of every cross ply is open.
- Dry the panel before any repair, with the edge exposed to air.
- Sand or plane the raised fibres back to flat.
- Fill any gaps between plies with epoxy filler.
- Seal the edge with two coats of paint, edge sealer or thinned epoxy.
- Keep water off the edge: a drip edge, a gap above the ground, or a trim strip.
The best repair is the one never needed: seal edges on the day the panel is cut. Our guide to cutting plywood adds the edge treatment to each cut.
How often should plywood be maintained?
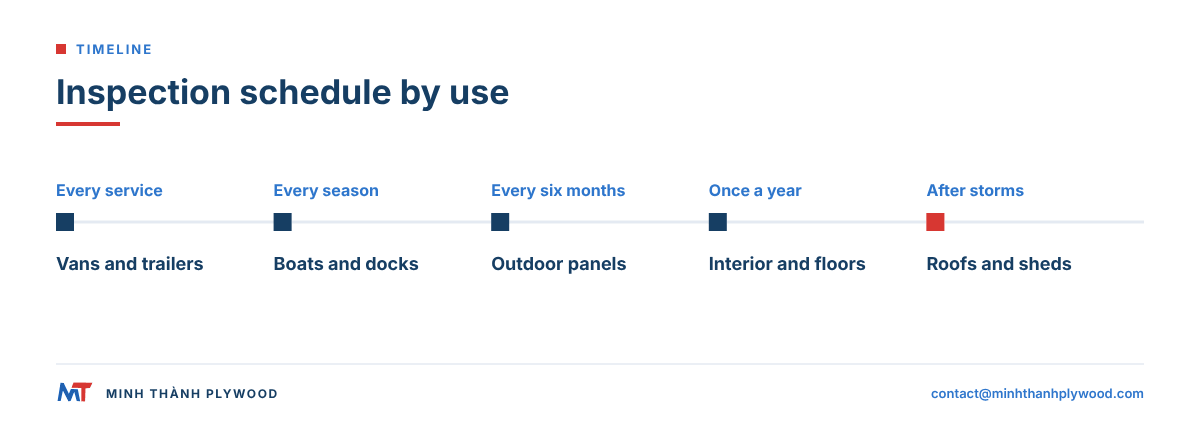
A short maintenance schedule keeps most plywood repairs small. Check outdoor and wet-area plywood more often than dry interior panels.
| Where | How often | What to check | What to do |
|---|---|---|---|
| Interior furniture and walls | Once a year | Chips, lifted edges, finish wear | Glue down, touch up finish |
| Floors and subfloors | Once a year, and after a leak | Soft spots, squeaks, stains | Screw down, repair, find leaks |
| Outdoor panels and signs | Every six months | Edge swelling, finish cracks, grey areas | Reseal edges, recoat, bleach stains |
| Roofs and sheds | After storms and once a year | Leaks, soft deck areas, lifted felt | Fix the cover, repair or replace bays |
| Boats and docks | Every season | Delamination, soft areas near fittings | Re-glue, harden, seal fittings |
| Vans and trailers | Every service | Floor film damage, wet edges | Patch the film, seal edges |
Write the date of each repair on the inside of the panel or in the maintenance log. A repeat failure in the same place points to a cause that has not been fixed.
Site damage or a manufacturing defect?
Most plywood damage on site comes from water, impact or the wrong panel for the exposure; a manufacturing defect shows on arrival or on panels that have been kept dry. Telling the two apart decides whether you repair at your cost or raise a claim with the supplier.
| Sign | More likely site damage | More likely a manufacturing defect |
|---|---|---|
| Delamination | Starts at an unsealed edge after wetting | Found on new, dry panels, across the sheet |
| Core voids | A cut can reveal a pre-existing gap; this alone does not show site damage | Gaps beyond the agreed core grade, including repeated gaps across a pack |
| Thickness | Swelling after water | Out of tolerance on arrival |
| Face defects | Dents, scratches from handling | Open joints or patches beyond the agreed grade |
| Warping | Uneven storage or one-side finishing | Packs bowed on arrival, before unwrapping |
Keep the evidence when you suspect a defect: photos of the pack label, the sheet, the defect and a ruler or caliper. Our plywood quality claims guide explains what to send.
How Minh Thanh panels resist the common damage
Panels built and finished well need fewer repairs. At Minh Thanh, our furniture-grade panels are pressed twice as standard: the core board is pressed and calibrated, then face and back are pressed on, which keeps the face flat and well bonded.
What reduces repair later:
- Stitched cores: core layers are stitched both horizontally and vertically, which reduces gaps and overlaps in the core.
- The right bond: UF glue at E0 emission for dry furniture and interiors; MR (melamine-fortified) or phenolic (WBP) bonds to the customer’s specification for damp and outdoor use.
- Moisture at dispatch: veneers and panels are dried to 8–12 % moisture content, the normal range for furniture plywood.
- Tolerance: sanded furniture panels down to ±0.2 mm, so faces stay level.
- Proof: every shipment is photographed and filmed before loading, and buyers receive the photos and the video; our quality and certificates page lists the test reports.
For outdoor uses such as stair treads and wall sheathing, our exterior plywood uses a water-resistant melamine-fortified or phenolic (WBP) glue.
What to order when you replace a panel
When a repair is not worth it, order a replacement panel that matches the original and suits the exposure that damaged it. Write one line per item.
- Use and exposure: interior dry, interior damp, exterior, floor, roof or boat.
- Thickness and size: match the original, for example 18 mm, 1220 × 2440 mm.
- Face and grade: species and face/back grade, matched to an approved sample.
- Core: white Styrax for light weight, Eucalyptus for stiffness and screw holding.
- Bond and emission: WBP for wet areas; UF glue at E0 emission for interior furniture. For a US replacement, the TSCA Title VI limit for hardwood plywood with a veneer core is 0.05 ppm of formaldehyde under 40 CFR 770.10.
- Quantity and delivery: sheets per pack, number of containers and the destination port.
Our minimum order is one 40HC, with mixed specifications by agreement; production takes 15–45 days after deposit. Free samples are available. Send the specification to contact@minhthanhplywood.com and we reply within hours.
Buyer questions, answered
How do you patch a hole in plywood?
Fill a small hole with two-part wood filler or epoxy filler, sand flush and seal. For a hole larger than a coin, cut a clean square or a dutchman, glue in a matching plug or a plywood patch with a backing piece, then fill, sand and finish.
Can rotted plywood be repaired?
Small, local rot can: dry the area, cut or scrape back to sound wood, harden the edges with a penetrating epoxy, then fill or patch. If rot has spread through several plies or across a floor bay, replace the sheet.
How do you remove water stains from plywood?
Sand the finish off the stain, then brush on a solution of oxalic acid wood bleach, let it work, rinse with clean water and let the panel dry before refinishing. Dark black stains from iron and tannin usually lift; grey weathering lifts with the same treatment.
How do you fix delaminated plywood?
Dry the area, open the gap gently, inject or brush in a waterproof glue such as epoxy or polyurethane, clamp or screw the layers together under a flat caul and leave it to cure. If the plies have separated over a large area, replace the panel.
How do you fix torn or chipped plywood veneer?
Glue a loose veneer flap back down with wood glue and a clamp. For a missing piece, cut the damaged area to a clean shape, glue in a matching piece of veneer with the grain aligned, then sand flush.
Can you sand out water damage on plywood?
You can sand out surface marks, but only lightly: face veneers are thin and sanding through them shows the next ply. Use bleach for stains rather than heavy sanding.
How do you remove stains from plywood in Australia?
The same methods apply: oxalic acid for water and tannin stains, a mild detergent for dirt and mould, and light sanding with fine paper before refinishing. Hardware stores sell oxalic acid as deck cleaner or wood bleach.
When should you replace plywood instead of repairing it?
Replace it when the panel is soft through its thickness, when a floor or roof deflects under foot, when delamination covers a large area, or when the repair would cost more time than a new sheet.
What is the best filler for plywood?
Two-part epoxy filler for exterior and wet areas, because it does not shrink and resists water; a wood filler for small dents on dry interior panels. Fill slightly proud and sand flush.
How do you stop plywood edges from swelling?
Seal every cut edge with paint, edge sealer or epoxy, and keep water from standing against the edges. Once an edge has swollen, sand it back, dry it and seal it.