
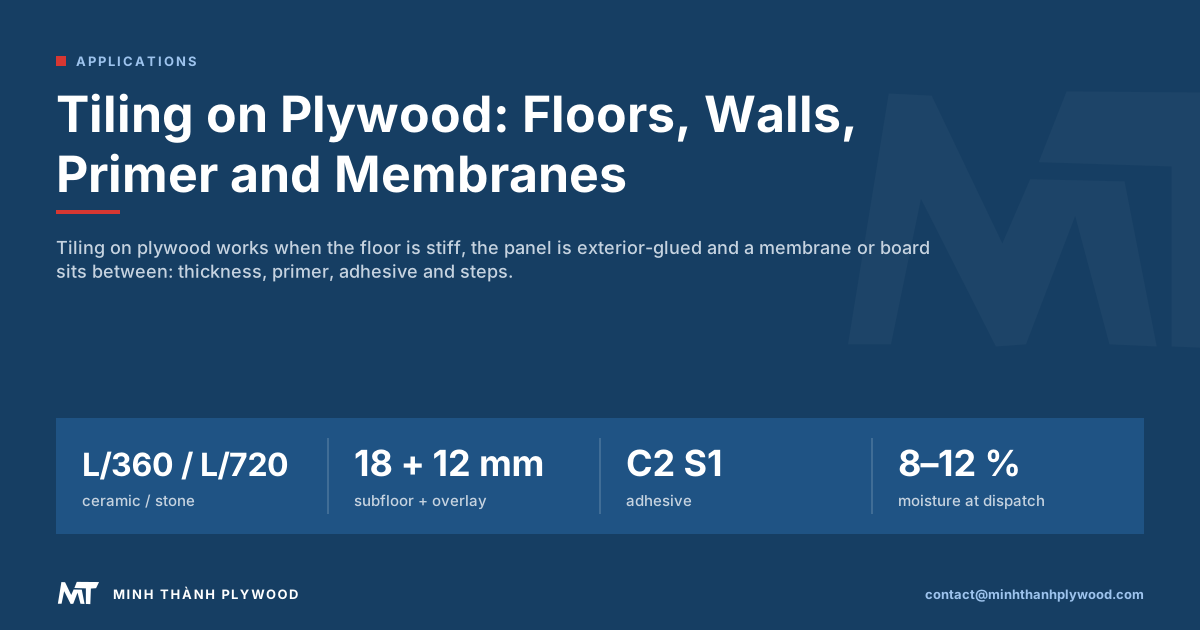
Yes, you can tile onto plywood, but rarely straight onto a single sheet. Tiling on plywood works when the floor is stiff enough for the tile, the panel is exterior-glued, the joints are screwed and a primer, decoupling membrane or backer board sits between plywood and adhesive. This guide from Minh Thanh Plywood gives the thicknesses, the order of layers and the checks for floors and walls.
Can you tile onto plywood? The short answer
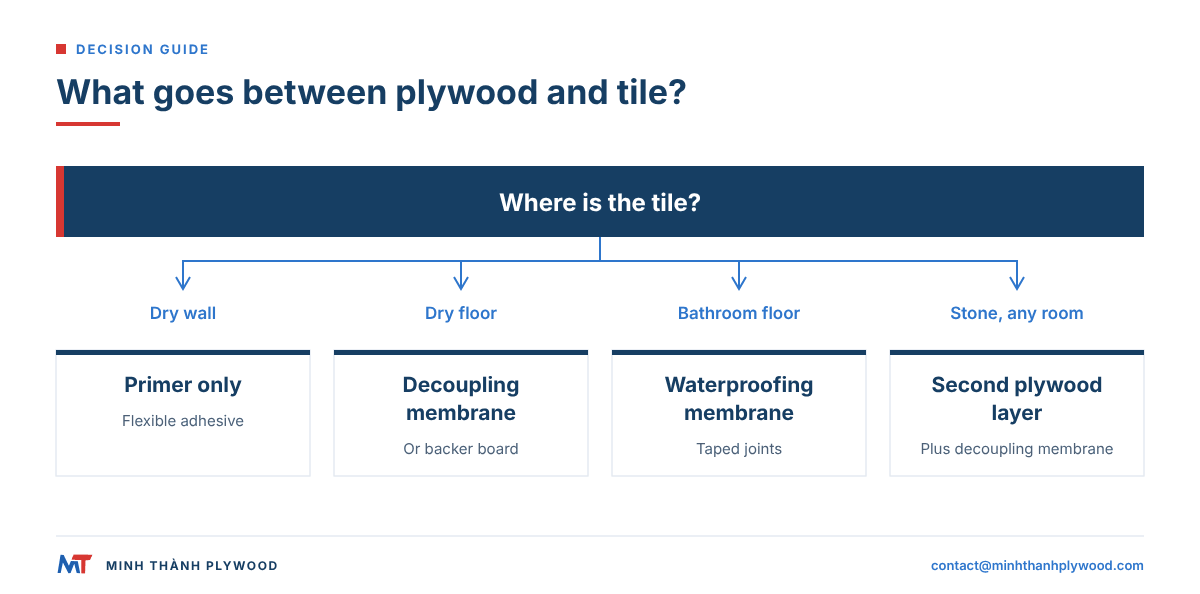
You can tile onto plywood when four things are true: the floor or wall is stiff, the plywood is exterior-glued, the sheets are screwed down with their joints supported, and something sits between plywood and tile to take up movement and keep water out. Miss one of the four and the grout cracks first, then the tiles loosen.
| Situation | Tile straight onto primed plywood? | What to add |
|---|---|---|
| Dry wall, small ceramic tiles | Yes, with primer and flexible adhesive | Nothing more |
| Dry floor, ceramic or porcelain | Not advised | Decoupling membrane or backer board |
| Bathroom floor | No | Waterproofing membrane or backer board with sealed joints |
| Shower walls and floor | No | Continuous waterproofing membrane |
| Natural stone, any room | No | Second plywood layer plus decoupling membrane |
| Floorboards underneath | No | Plywood overlay, then membrane |
Tiling on plywood is normal in timber-framed houses, flats with timber joists, loft conversions and mobile buildings. The plywood gives the stiff, flat, screw-holding deck; the membrane or board gives the tile what plywood cannot: a surface that does not swell when wet.
What happens if you tile directly on plywood?
Tile laid straight onto bare plywood usually fails at the grout lines and edges within the first heating season. Plywood takes up and gives off moisture with the air around it, and each veneer swells across its grain. Tile and grout do not move at all, so the bond line takes the strain.
The common failures follow from that:
- Cracked grout along sheet joints, where two plywood sheets move against each other.
- Hollow-sounding tiles, where the adhesive has let go of the plywood face.
- Cracked tiles over a joist, where the floor bends under a point load.
- Swollen, soft plywood at the edges in bathrooms, where water got through grout and reached a panel glued for dry use.
A primer, a flexible adhesive and a membrane each stop one of these. Stiffness stops the third, and only the right glue class stops the fourth.
How stiff must a floor be for tile? L/360 and L/720
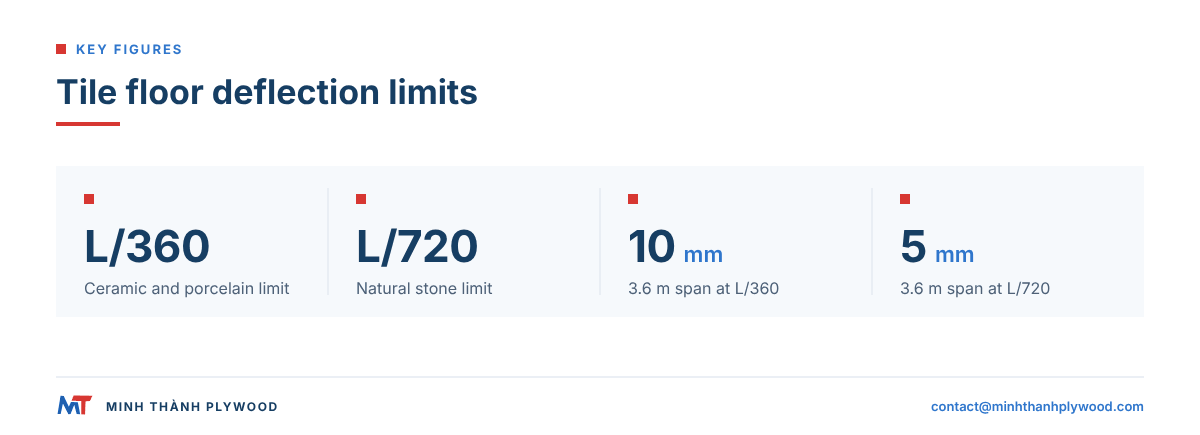
A tiled floor should not bend more than its span divided by 360 for ceramic and porcelain, and its span divided by 720 for natural stone. L is the clear span of the joist; on a 3.6 m span, L/360 allows 10 mm of bending under the design load, and L/720 allows 5 mm. These two limits come from the Tile Council of North America (TCNA) Handbook and are the figures most tile and adhesive makers quote.
Two kinds of stiffness matter:
- Joist deflection: the whole floor bending between walls. This is fixed by joist size and spacing, not by plywood. If the joists fail L/360, add joists, sister them or add a beam before you choose plywood.
- Deflection between joists: the plywood bending between two joists. This is where plywood thickness, ply count and the number of layers decide the result.
Most tile assemblies over timber assume joists at 400 mm centres. At 600 mm centres the plywood spans further, so the deck needs a thicker panel, a second layer or a backer system rated for that spacing. Stone usually needs both a second layer and a decoupling membrane.
What thickness plywood under tile?
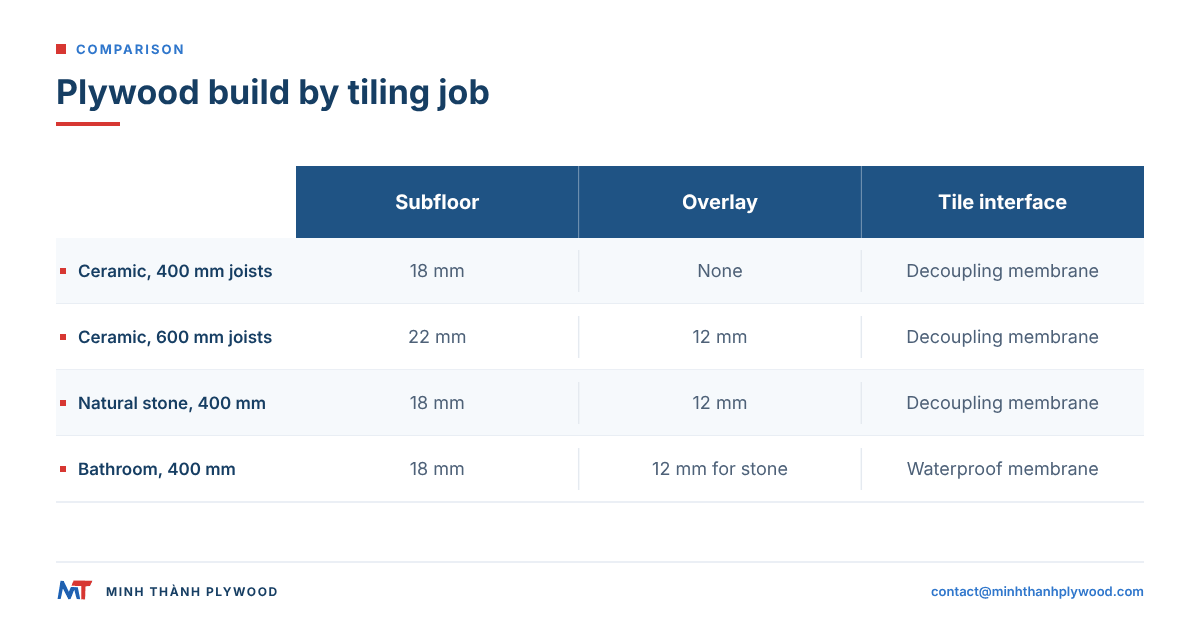
For a tiled floor, use a structural plywood subfloor of 18 mm or more, and add a second layer of 12 mm or more for natural stone, large-format tiles or joists at 600 mm centres. For walls, 12 mm is the usual minimum and 15 mm where heavy tiles or fittings hang.
| Build | Joists or studs | Subfloor | Overlay | Between plywood and tile |
|---|---|---|---|---|
| Ceramic or porcelain floor | 400 mm centres | 18 mm exterior plywood | Not needed | Decoupling membrane |
| Ceramic or porcelain floor | 600 mm centres | 22 mm exterior plywood | 12 mm exterior plywood | Decoupling membrane |
| Natural stone floor | 400 mm centres | 18 mm exterior plywood | 12 mm exterior plywood | Decoupling membrane |
| Bathroom floor | 400 mm centres | 18 mm exterior plywood | 12 mm for stone | Waterproofing membrane |
| Floor over old floorboards | 400 mm centres | Existing boards, screwed | 12 to 15 mm exterior plywood | Decoupling membrane |
| Tiled wall, dry | 400 mm centres | 12 mm exterior plywood | Not needed | Primer only |
| Tiled wall, shower | 400 mm centres | 15 mm exterior plywood | Not needed | Waterproofing membrane |
Thickness also sets how flat the deck stays. Thicker panels with more plies bend less between screws and joists, so the tile bed stays even. A calibrated, sanded panel also starts flatter: Minh Thanh Plywood sands furniture panels to ±0.2–0.3 mm and commercial panels to ±0.5 mm, which keeps lips between sheets small before any levelling.
Which plywood for tile on plywood: grade and glue
Use exterior plywood bonded with phenolic (WBP) glue, or at least melamine-fortified MR glue, for tile on plywood. The face grade does not matter because tile covers it. The glue matters, because water that passes grout and adhesive reaches the panel sooner or later.
- WBP (phenolic) glue: the bond holds after soaking and boiling tests, the class EN 314-2 calls Class 3. This is the right glue for bathrooms, kitchens and any floor that may be mopped.
- MR or melamine-fortified glue: holds in humid rooms (EN 314-2 Class 2 type use). Acceptable for dry living areas and walls.
- Interior UF glue: for furniture in dry rooms. Do not use it under tile in wet areas: once water reaches the core, the bond weakens and the face lifts.
The bond classes are set in EN 314-2, plywood bonding quality requirements. Ask for the class in writing, not just the word “exterior”. The panel type for dry, humid or exterior conditions is set by EN 636.
Two more points make the panel work under tile. Choose a sanded face, because primer and adhesive key better to a clean, flat surface. Choose a closed core, because voids under a tile become soft spots. Minh Thanh’s exterior plywood uses utility C/D faces with WBP or melamine-fortified glue, made for exactly this kind of covered, structural use.
Why MR plywood fails in wet areas
MR plywood resists humidity, not standing water. In a shower or behind a bath, water stands in grout joints for hours, reaches the panel edge and stays. The glue line softens, the core swells and the tiles above it tent or crack. In wet areas, specify WBP glue and a waterproofing membrane together.
Tiling over floorboards: overlay with plywood first
Floorboards are too uneven and move too much to tile on. Fix each loose board with screws into the joists, plane or sand down high edges, then overlay the boards with exterior plywood of 12 mm at least, 15 mm for larger tiles. Where the plywood is structural, US practice is a grade-stamped panel made to Voluntary Product Standard PS 1-22.
Lay the overlay sheets across the boards, with their joints staggered against both the boards and each other. Leave a small gap of about 3 mm between sheets and at the walls. Screw the plywood into the boards at close centres across the whole sheet, not only at the edges; screws that miss the joists still hold the two layers together, which is what stops movement.
Never glue the overlay to boards that may move with the seasons. Screws let each layer settle; a rigid glue line between them can shear and squeak.
How to tile on a plywood floor, step by step
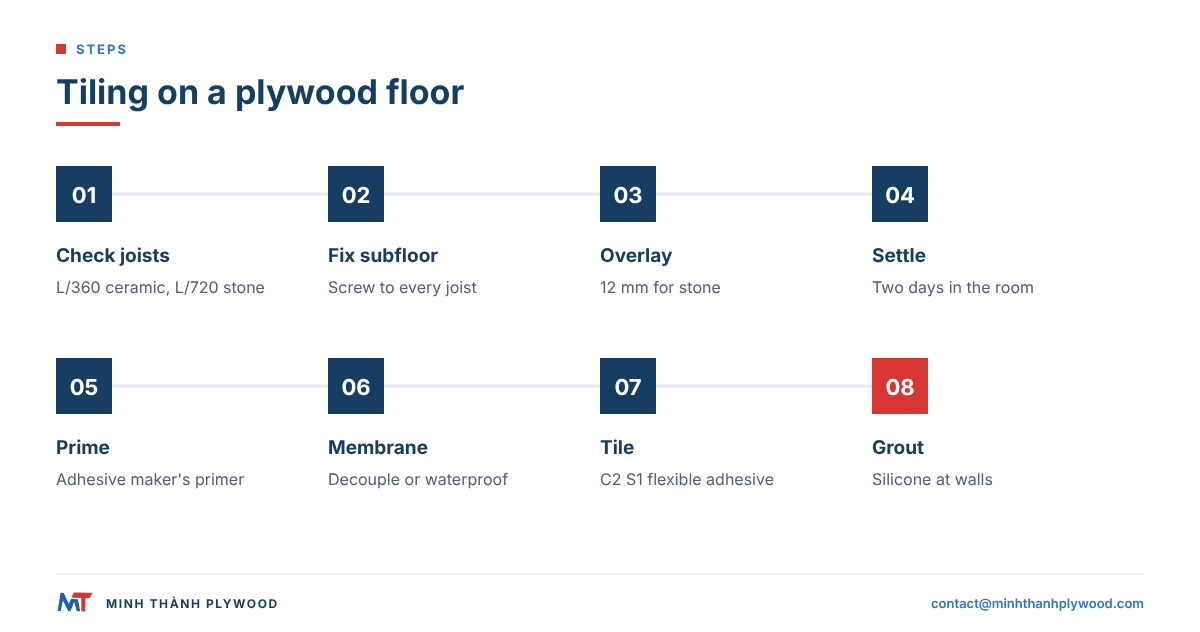
Tiling on a plywood floor takes nine steps, from checking the joists to grouting.
- Check the joists. Measure the span and spacing; if the floor fails L/360 for ceramic or L/720 for stone, stiffen it first.
- Fix the subfloor. Screw the plywood to every joist, tongue-and-groove edges glued or square edges blocked underneath.
- Add the overlay where needed. A second layer of 12 mm or more for stone, large tiles or wide joists, joints staggered.
- Let the plywood settle. Store sheets in the room for two days before fixing so they reach the room’s moisture.
- Fill and flatten. Sand down lips, fill screw heads, vacuum the dust.
- Prime. Apply the primer the adhesive maker names, and let it dry.
- Lay the membrane or board. Decoupling membrane on dry floors, waterproofing membrane in bathrooms, tape every joint and corner.
- Tile. Use a flexible C2 S1 adhesive, solid bed, back-butter large tiles, leave movement joints at walls.
- Grout and seal joints. Flexible grout, silicone at walls, thresholds and around pipes, never hard grout.
Each step answers a failure from the list above: steps 1 to 3 stop bending, step 4 stops later shrinkage, steps 5 and 6 give the bond, step 7 takes movement and water, steps 8 and 9 keep the tile and grout flexible.
Do you need to prime or seal plywood before tiling?
Yes, prime plywood before tiling, with the primer the adhesive maker specifies for timber. Primer controls how fast the plywood draws water out of the adhesive and gives the adhesive a key. It is not a waterproofing layer.
Three common mistakes:
- Diluted PVA as a primer. PVA re-wets under cement adhesive and the bond can let go. Tile adhesive makers warn against it.
- Sealing with varnish or paint. A glossy film gives the adhesive nothing to grip.
- Skipping the edges. Seal the cut edges and the underside of plywood in damp places, because water enters end grain fastest.
A plywood delivered dry is easier to prime. Minh Thanh dries veneers and finished panels to 8–12 % moisture content at dispatch, the normal range for indoor panels; let them settle in the room before priming.
Which membrane over plywood?
Use a decoupling membrane over plywood on dry floors and a waterproofing membrane in bathrooms and showers. A decoupling membrane is a thin, grooved or fleece-backed sheet that lets the plywood move without passing the movement to the tile. A waterproofing membrane is a sheet or liquid coat that stops water reaching the plywood.
| Layer | What it does | Where to use it over plywood |
|---|---|---|
| Primer | Controls suction, gives a key | Always, under adhesive or membrane |
| Decoupling membrane | Takes up movement between plywood and tile | Dry floors, large tiles, stone |
| Waterproofing membrane (sheet) | Stops water, some also decouple | Bathroom floors, showers, wet rooms |
| Liquid waterproofing | Painted-on water barrier, taped joints | Shower walls, splash zones |
| Tile backer board | Stiff, water-tolerant tiling surface | Walls and floors, often in wet areas |
Several sheet membranes do both jobs, decoupling and waterproofing, and are approved by their makers directly over exterior plywood. Read the maker’s minimum plywood thickness and joist spacing for the product you buy. When you compare boards and membranes, the tile backer board vs plywood guide sets cement board, foam board and plywood side by side.
Which adhesive and grout for tiling onto plywood?
For tiling onto plywood, use a flexible, improved cement-based adhesive: class C2 with deformability S1 or S2 under EN 12004. S1 adhesive bends a little without cracking; S2 bends more and suits larger tiles and timber floors with more movement.
- Bed: solid, no voids. Use a notched trowel sized for the tile, and back-butter tiles larger than about a hand span.
- Grout: flexible cement grout or a resin grout. Hard, non-flexible grout cracks first over timber.
- Movement joints: at every wall, around pipes, at thresholds and across large rooms, filled with silicone, not grout.
- Ready-mixed paste: only for small, light wall tiles on dry walls.
In New Zealand, Australia and the UK, the same rule applies under different brand names in the trade shops: ask for a flexible adhesive rated for timber floors and its matching primer.
Tiling a bathroom floor over plywood
Tiling a bathroom floor over plywood needs WBP-glued plywood of 18 mm or more, screwed at close centres, primed, then a waterproofing membrane with sealed joints and corners, and a flexible adhesive. Around a shower tray or level-access shower, the membrane runs up the walls and over the floor in one continuous layer.
The weak points in a bathroom are always the same: the joint between floor and wall, the pipes through the floor, the drain and the threshold. Tape each with the membrane maker’s corner pieces and collars. A tile can be replaced; soaked plywood under a bath means lifting the whole floor.
Ventilation matters as much as the membrane. A bathroom with a working extractor keeps the plywood in its normal moisture range; one without it keeps the whole deck damp for hours after each shower. For walls, vanities and wet zones in more detail, read plywood in bathrooms.
Tiling over plywood walls
On a dry wall, you can tile directly onto primed plywood of 12 mm or more, fixed to studs at 400 mm centres. Wall tiling on plywood is common in timber-frame houses, cabins and fit-outs, because plywood holds screws for shelves, rails and cabinets anywhere on the wall.
- Dry walls: exterior or MR plywood, primed, flexible adhesive.
- Splash zones behind basins and worktops: primer plus a liquid waterproofing coat.
- Shower walls: WBP plywood of 15 mm, primer, waterproofing membrane across the full wet zone, taped corners.
- Heavy tiles or stone on walls: thicker plywood, closer stud spacing and the adhesive maker’s weight limit for timber backgrounds.
Plywood suits wall tiling where plasterboard would need extra noggins for every fitting. The screw holding of a cross-laminated panel is the reason builders choose it for tiled walls that also carry a vanity or a heated rail.
Large-format and natural stone tiles on plywood
Large-format and stone tiles need a stiffer, flatter deck: two layers of exterior plywood, a decoupling membrane and an S2 adhesive. Natural stone is weaker in bending than porcelain and cracks at half the deflection, which is why its limit is L/720 against L/360.
Flatness matters as much as stiffness. A long tile bridges small dips in the plywood; when someone steps on the edge, it rocks and cracks. Sand down lips at sheet joints, check the deck with a long straightedge and fill dips before priming. A panel with a tight thickness tolerance saves most of this work, because adjacent sheets meet at the same height.
What to check after tiling on plywood
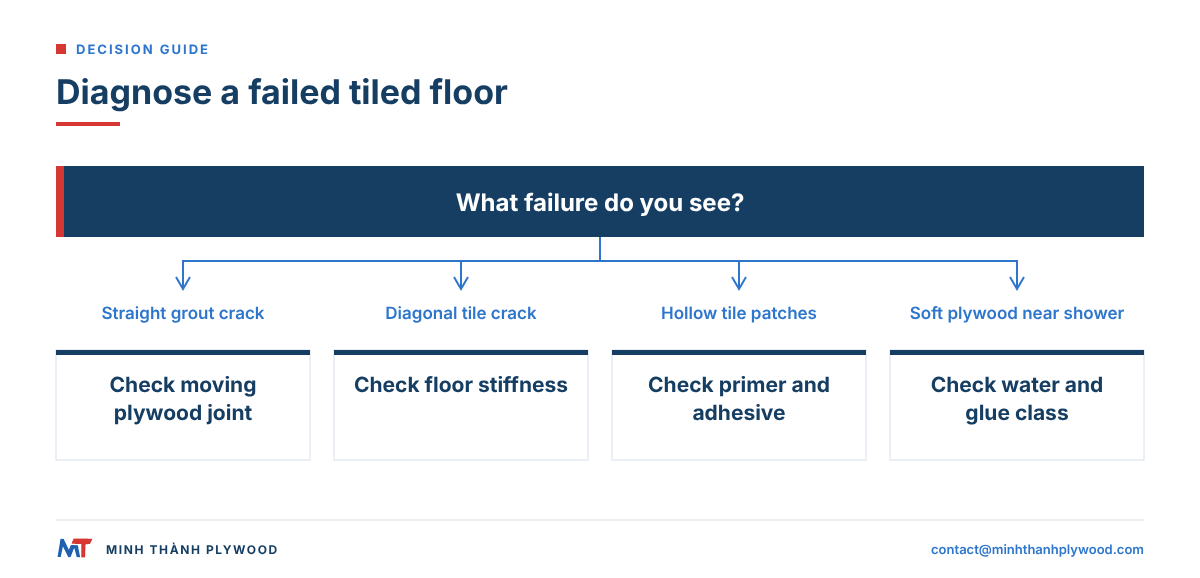
Check a tiled plywood floor for three signs over its first year: cracked grout along a line, hollow-sounding tiles and a soft spot near water. Each points to one cause.
| What you see | Usual cause | Fix |
|---|---|---|
| Cracked grout in a straight line | Plywood sheet joint moving | Screw the joint, decoupling membrane on relay |
| Diagonal crack through tiles | Floor bending between joists | Stiffen joists or add a plywood layer |
| Hollow tiles in patches | Adhesive bond lost, no primer or wrong primer | Lift, prime correctly, relay |
| Soft, swollen plywood near a shower | Water through grout, wrong glue class | Replace with WBP plywood and membrane |
| Grout cracks at the walls | No movement joint | Cut out, fill with silicone |
What to order when buying plywood for tiled floors
For tiled floors and walls, order exterior plywood with WBP or melamine-fortified glue, a sanded face, a closed core and a stated thickness tolerance. These four lines decide how the deck behaves under tile; the face appearance does not.
Minh Thanh Plywood makes exterior plywood with WBP or melamine-fortified glue to the buyer’s specification, in 1220 × 2440 mm and 1250 × 2500 mm sheets and thicknesses from 3 to 40 mm. Cores are stitched both ways and pressed into a closed panel. At 18 mm, a sheet on a Styrax core weighs about 26.8 kg and on Eucalyptus about 34.8 kg, which matters to fitters carrying sheets up stairs. A 40HC carries 990 sheets of 18 mm on Styrax core or 795 on Eucalyptus. Orders start at one 40HC, with production in 15–45 days after deposit.
A specification line for tiled floors reads: exterior plywood, WBP phenolic glue, eucalyptus core, C/D faces sanded, 18 mm ±0.5 mm, 1220 × 2440 mm, moisture 8–12 %, one 40HC, FOB Hai Phong. Send yours, or ask for free samples, through the quotation form. For the whole flooring family, start at wood flooring types; for chipboard decks in lofts, see chipboard flooring and loft boards vs plywood.
Buyer questions, answered
Can you tile directly onto plywood?
On a dry wall or a small dry floor you can, with a primer and a flexible adhesive. On most floors, and in any bathroom, put a decoupling membrane, waterproofing membrane or backer board between the plywood and the tile, because plywood moves with moisture and tile does not.
What thickness plywood do I need under tile?
For a floor, use a structural subfloor of 18 mm or more, plus an overlay of at least 12 mm when tiling over floorboards or a springy deck. For walls, 12 mm on studs at 400 mm centres is the usual minimum, and 15 mm or more where heavy tiles or fittings hang.
Do I need to prime plywood before tiling?
Yes. Prime the plywood with the primer named by the adhesive maker, so the plywood does not draw water out of the adhesive too fast and the adhesive keys to the face. A sealing coat of diluted PVA is the wrong primer under cement adhesive.
Should I seal plywood before tiling?
Seal the cut edges and the back face where they meet damp, and prime the face with the adhesive maker's primer. In a wet area, the waterproofing membrane is the seal; the plywood is only the stiff backing.
What do you put on plywood before tiling a bathroom?
Prime the plywood, then lay a waterproofing membrane with taped corners and joints, or fix a tile backer board and waterproof its joints. In a shower area the membrane should run continuously across floor and walls.
Which membrane goes over plywood?
A decoupling membrane on dry floors, to absorb the movement between plywood and tile. A waterproofing membrane, sheet or liquid, in bathrooms and showers. Several sheet products do both jobs, and some are approved directly over plywood.
What adhesive is best for tiling onto plywood?
A flexible, improved cement-based adhesive classed C2 with deformability S1 or S2 under EN 12004, applied over the primer. Ready-mixed paste adhesives are only for small, light wall tiles in dry areas.
Can you tile on chipboard or OSB instead of plywood?
Tile makers advise against tiling straight onto chipboard or OSB, because both swell at the edges when wet. Overlay them with exterior-glued plywood or a backer board first, then prime and tile.
What thickness plywood for tiling over floorboards?
Screw down the floorboards, then overlay with exterior-glued plywood of at least 12 mm, 15 mm for larger tiles or wider joist spacing, screwed at close centres into the boards and staggered against the board joints.
Can you lay large-format or stone tiles on plywood?
Yes, on a stiffer floor. Natural stone needs a floor twice as stiff as ceramic, usually two layers of plywood plus a decoupling membrane. Large-format tiles also need a flatter plywood surface.