
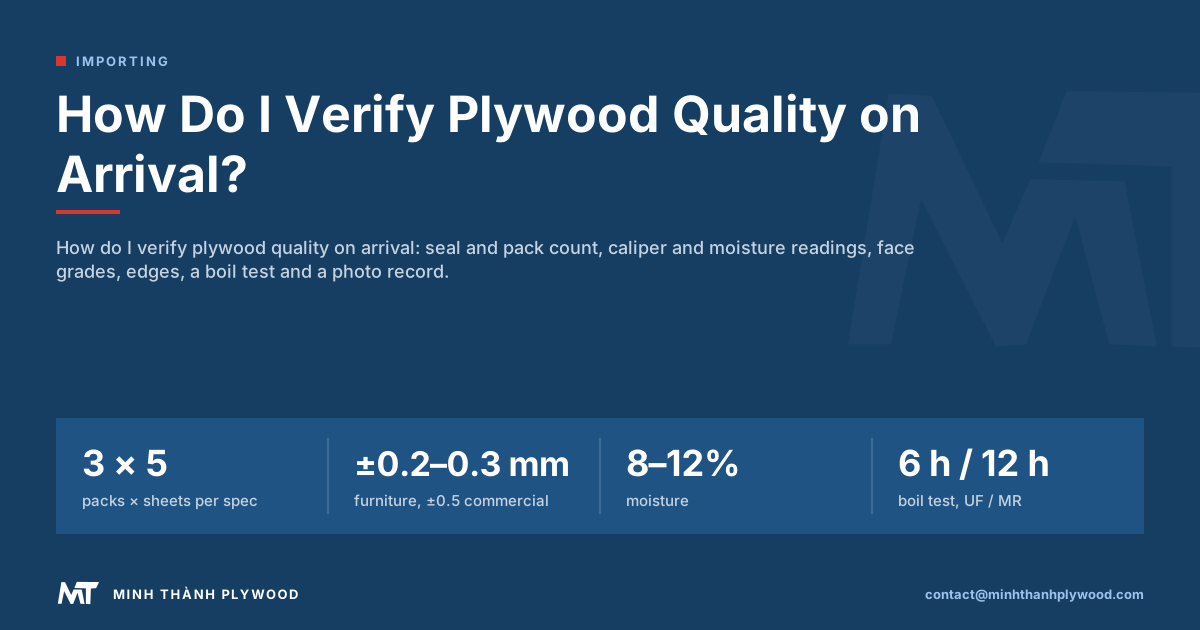
To verify plywood quality on arrival, check the seal and the pack count against the packing list, then open sample packs and measure thickness, size, moisture, faces, edges and bond against the specification and approved sample of your order, photographing every step. The whole check takes two people about half a day per container. Minh Thanh Plywood measures the same points at the factory and sends the photos and video of each container before it is sealed, so your arrival readings have a record to compare with.
How do I verify plywood quality on arrival?
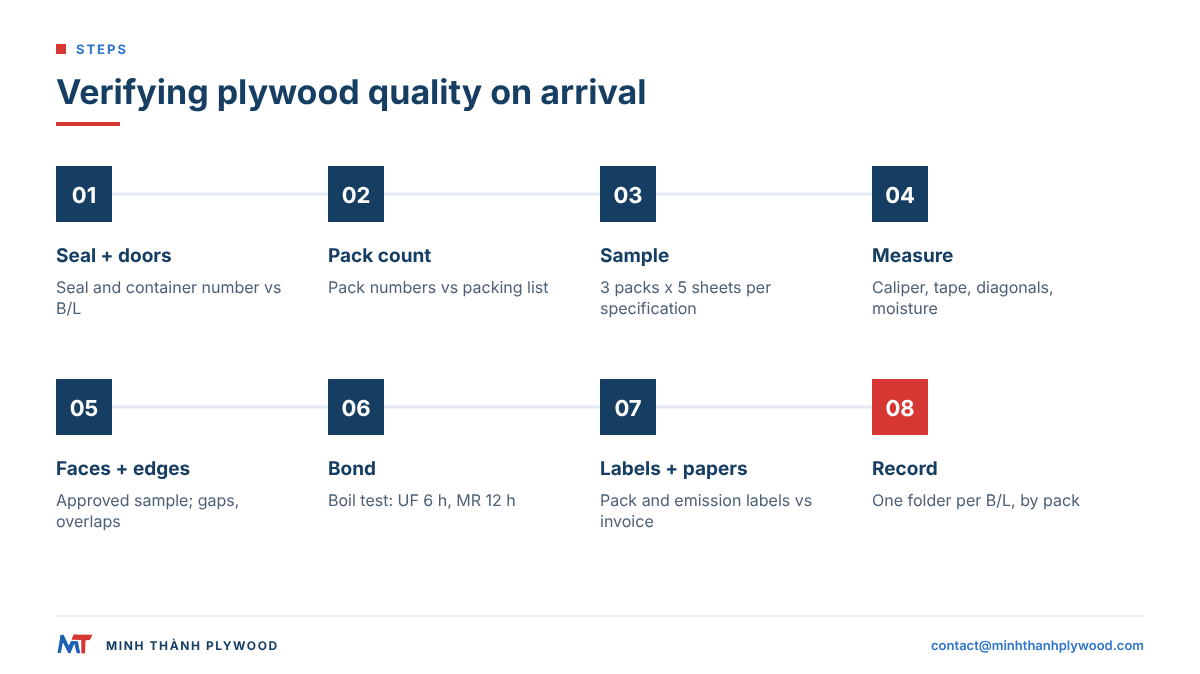
You verify plywood quality on arrival by checking the paper first, then the packs, then a sample of sheets against your order’s specification and approved sample. The routine below works for a 20-foot or a 40HC container and takes two people about half a day.
- Before opening: seal number, container number and doors against the bill of lading.
- Unloading: pack count and pack numbers against the packing list.
- Sampling: at least three packs from the door end, the middle and the nose.
- Measurements: thickness, length, width, squareness and moisture.
- Appearance: faces and backs against the approved sample; edges for gaps and overlaps.
- Bond: a boil test on small samples.
- Labels and papers: formaldehyde labels, pack labels, invoice lines.
- Record: one photo folder per container, named by the bill of lading number.
Each step answers one question about the order. The sections below give the tools, the numbers and what a reading means.
What should you check before the container is opened?
Check the seal before anything else. Compare the seal number and the container number with the bill of lading and the packing list, then photograph the closed doors, the seal and any dents or holes in the box.
What to look for:
- Seal: intact and with the right number. A different seal number means the container was opened after loading.
- Container walls and roof: holes, rust-through or dents above the load line can let water in.
- Doors on opening: photograph the load exactly as found, before a forklift touches it. Packs leaning or shifted, wet floor or torn wrapping go in the record now, not later.
These first five minutes separate what happened at sea from what happened at the factory. Minh Thanh films every container before the doors close, so your door photo can be laid next to the loading video.
How do you count the packs against the packing list?
Count the packs as they come out and read each pack label against the packing list line by line. The list shows pack numbers, sheets per pack, specification, net and gross weight and volume for every specification in the container.
| On the packing list | What you check | What a difference means |
|---|---|---|
| Number of packs | Packs unloaded | A missing pack is a count issue for the shipper and the carrier |
| Pack numbers | Label on each pack | A pack under the wrong specification goes to the wrong customer |
| Sheets per pack | Count one or two sampled packs | A short pack changes the m³ you paid for |
| Specification | Thickness and face marked on the label | Check against the measured sheet |
| Gross weight | Optional: weigh one pack | A heavy pack can mean wet panels |
Pack numbers link each pack to its production lot and to the loading photos. Write the pack number on every photo and every measurement from the start.
How many sheets should you sample?
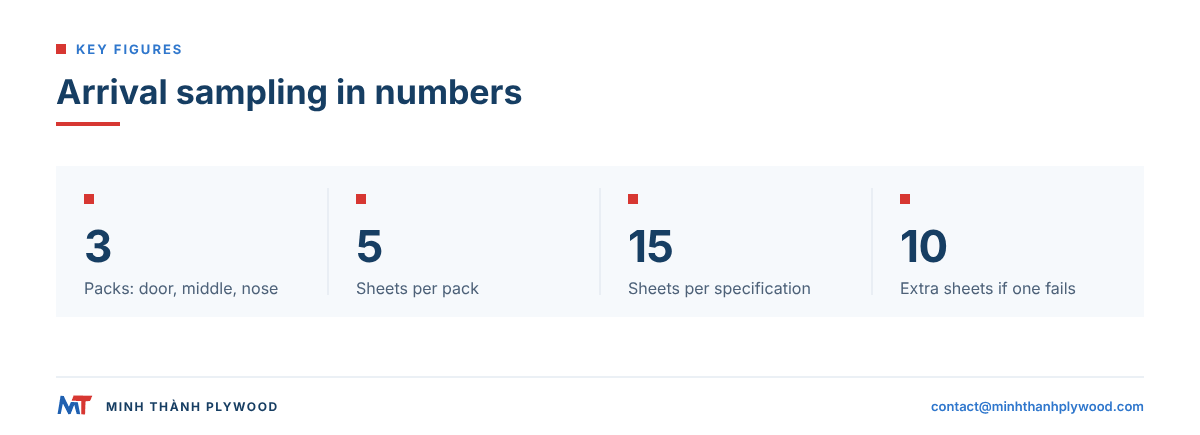
Open at least three packs, one from the door end, one from the middle and one from the nose of the container, and check five sheets from each: the top sheet, the bottom sheet and three from inside the pack. That gives fifteen sheets per specification, enough to see a pattern without unpacking the load.
Widen the sample when you find something:
- One sheet out of tolerance: check ten more from the same pack.
- Several sheets out in one pack: check two more packs of the same specification.
- A mixed container: sample each specification on its own; one specification’s result says nothing about the next.
Mark sampled sheets with chalk and the pack number before they are moved. Return them to their own pack after the check, so the pack count stays right.
How do you measure thickness and size on arrival?
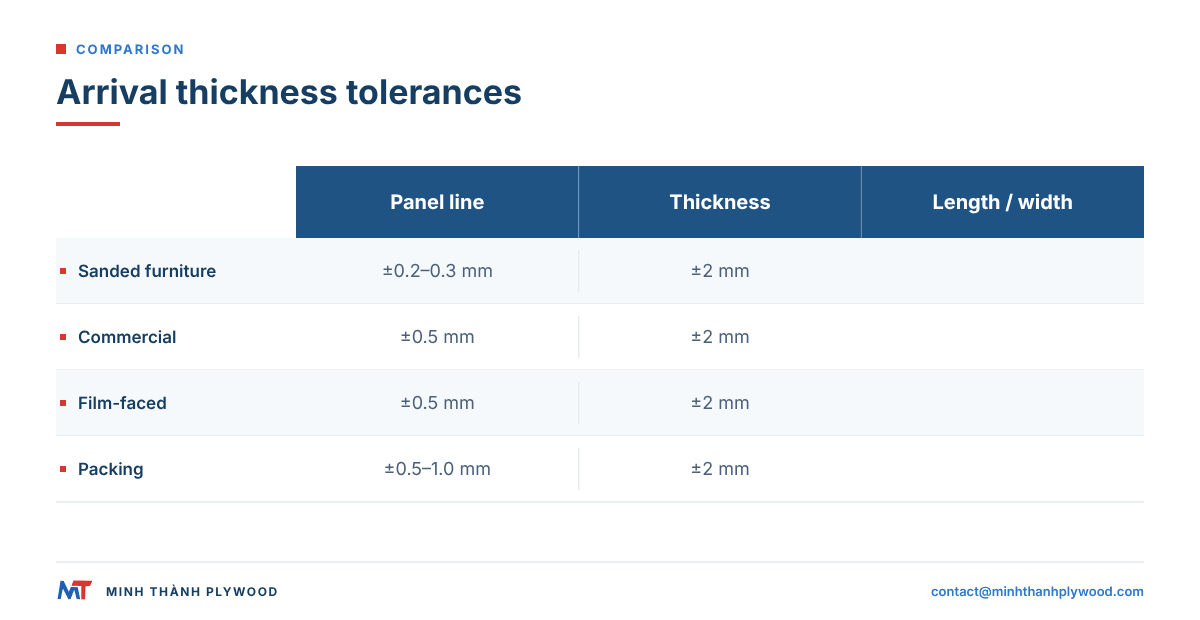
Measure thickness with a digital caliper at the edges of each sampled sheet, at least four points per sheet, about 25 mm in from the edge, and size with a steel tape on both long and both short edges. Compare the readings with the tolerance on your order.
| Product line | Thickness tolerance | Length and width |
|---|---|---|
| Sanded furniture plywood | ±0.2–0.3 mm | ±2 mm |
| Commercial plywood | ±0.5 mm | ±2 mm |
| Film-faced plywood | ±0.5 mm | ±2 mm |
| Packing plywood | ±0.5–1.0 mm | ±2 mm |
These are the limits Minh Thanh checks at the factory, where panels from every pack are measured with a digital caliper at several points and the readings are photographed for the shipment record. Your arrival readings should land in the same range.
For squareness, measure both diagonals of a sheet: a 1220 × 2440 mm sheet has diagonals of about 2728 mm, and the two readings should match within a few millimetres. For flatness, lay a straightedge along both long edges and both diagonals and measure the largest gap, which shows bow, cup or twist.
What moisture reading should imported plywood show?
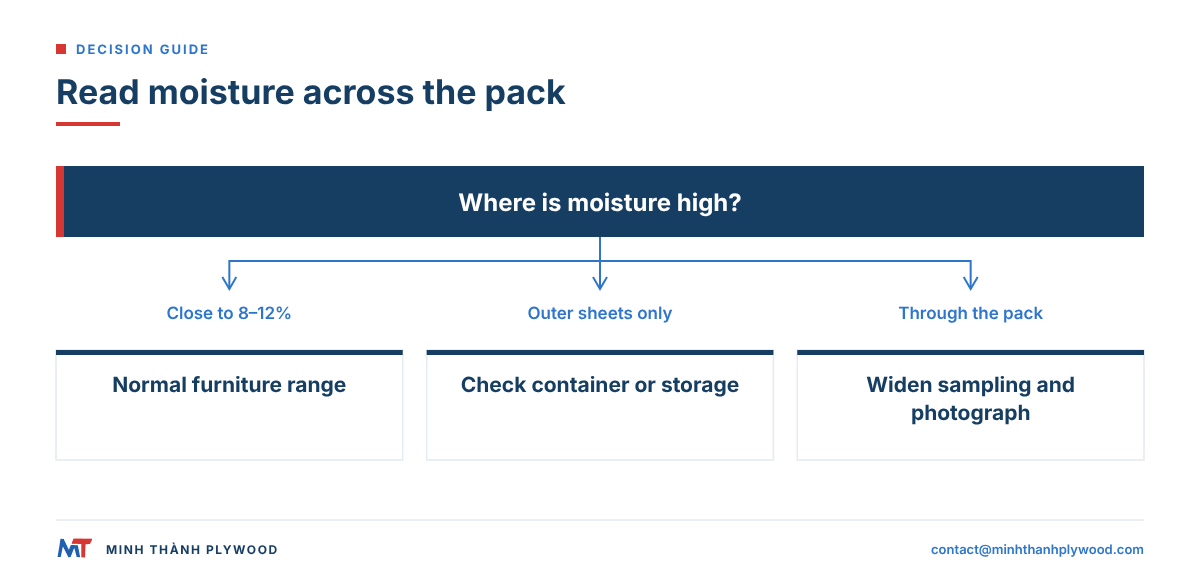
Furniture plywood leaves Minh Thanh at 8–12% moisture content, the normal range for furniture panels. Read moisture on arrival with a pin or pinless meter set for the face species, on three points of each sampled sheet, and record the reading with the pack number.
How to read the result:
- Close to 8–12%: normal; the panels travelled dry.
- Outer sheets high, inner sheets normal: water reached the pack from outside, in the container or in storage.
- High all through the pack: a pack-level problem worth a wider sample and photos.
Let panels acclimatise before machining. Plywood moved from a cold container into a heated workshop gains or loses moisture over several days, and a sheet cut on the first day can move afterwards.
How do you check faces against the approved sample?
Lay sampled sheets next to the approved sample under even daylight or daylight-balanced lamps and compare colour, grain, knots, splits, patches and sanding. The sample you approved before production is the standard; a grade name alone is not.
Face grades are quoted as face/back pairs, so check both sides of each sheet:
| Face veneer | Grade pairs used | What to compare |
|---|---|---|
| Poplar, eucalyptus | A/A, A/B, B/B | Colour, knots and repairs on the face; the back for B or the agreed grade |
| Birch | D+/D, D/E (D+/D comparable to B/BB) | Pin knots, colour streaks, patches |
| Pine | A/A, A/B, B/B, B/C | Knots and resin, splits |
| Engineered veneer (EV) | To the approved sample | Grain pattern and colour match across sheets |
Photograph each sheet with the sample beside it and the pack number in frame. A photo without the sample proves nothing about the grade.
How do you find core gaps, delamination and warp?
Look at all four edges of every sampled sheet. Edges show the core:
- Core gaps: open spaces between core veneers, visible as dark slots in the edge. On a furniture panel they telegraph through the face after lacquering.
- Overlaps: two core veneers on top of each other, felt as a bump on the face and seen as a thick line in the edge.
- Delamination: plies that separate along a glue line. Push a thin blade into the edge; a ply that lifts is a bond fault.
- Warp: bow, cup or twist measured with the straightedge from the size check.
Minh Thanh lays cores by hand and fixes gaps and overlaps before the glue, stitches the outer two to four core layers horizontally and vertically, and presses furniture panels twice: the core board is pressed and calibrated, then the face and back are pressed on. A panel out of flat or out of square at the factory moves to a lower-grade line, so warp found on arrival usually points to storage or stacking.
How do you test the glue bond at your warehouse?
Run a boil test. Cut three small square samples from sheets in different packs, put them in boiling water and check them at intervals for plies that lift or separate.
| Glue on the order | How long the bond should hold in boiling water |
|---|---|
| UF glue at E0 emission (interior) | about 6 hours |
| Melamine-fortified (MR) glue | about 12 hours |
These are the times Minh Thanh’s factory boil test uses on production samples. A sample that opens well before its time shows a bond fault; one that holds shows the glue line is sound. The boil test checks the bond, not formaldehyde emission: emission is measured in a test chamber, and the six ASTM D6007 reports behind Minh Thanh’s CARB P2 / TSCA Title VI certification averaged 0.014–0.032 ppm. The limit for veneer-core hardwood plywood is 0.05 ppm under EPA’s TSCA Title VI requirements.
For a European order, the bond requirement is set by a standard, not by the boil test alone: the BSI record for BS EN 314-2:1993 identifies the bonding-quality requirements.
Keep the boiled samples, dried and labelled with the pack number, in the container folder.
How do I verify bintangor plywood quality when it arrives at my warehouse?
Verify bintangor plywood with the same routine, plus three checks that matter for this face. Bintangor is a reddish-brown tropical hardwood veneer used on commercial plywood for furniture carcasses, shelving and painted work.
- Colour and match: bintangor varies from light pink-brown to darker red-brown. Compare the colour spread in the pack with the approved sample, not with one perfect sheet.
- Face splits and open joints: thin tropical faces can split along the grain in dry storage. Check the face across its width and at the ends.
- Thickness: commercial bintangor panels run to ±0.5 mm. Measure as for any commercial panel.
Bintangor faces are made on request at Minh Thanh, on Styrax or Eucalyptus cores. When you order, approve a sample of the colour range you accept; that sample settles every colour question on arrival.
Plywood defects on arrival: production or transit?
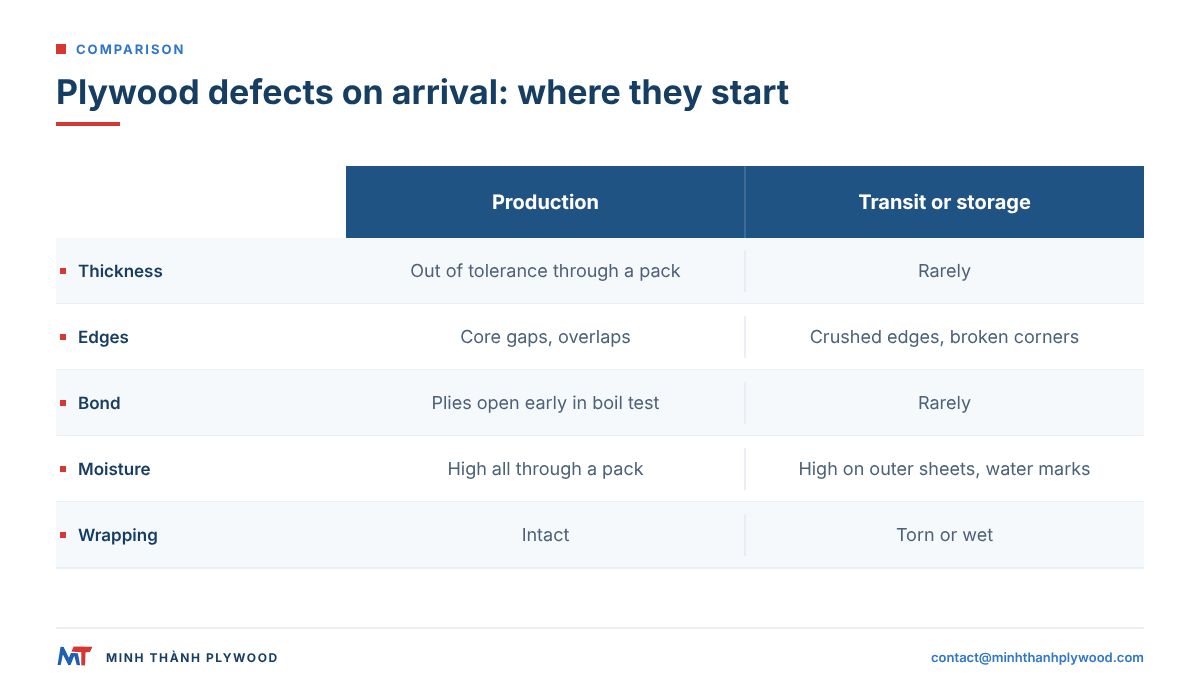
Most plywood defects on arrival point clearly to where they started. Sorting them early tells you who to speak to: the factory, the carrier or your own warehouse.
| Defect found | Most likely start | What shows it |
|---|---|---|
| Thickness outside tolerance through a pack | Production | Caliper readings on several sheets |
| Core gaps or overlaps | Production | Edges of sampled sheets |
| Delamination in the boil test | Production | Plies separate early |
| Face below the approved sample | Production | Sheet beside the sample |
| Broken corners, crushed edges | Handling or transit | Damage on outer sheets, torn wrapping |
| Water stains, high moisture on outer sheets | Container or storage | Wet floor, condensation marks, meter readings |
| Mould on outer sheets | Long damp storage | Wet wrapping, time in port |
| Warp after storage | Stacking on uneven bearers | Sheets flat in the pack, bent at the edge of the stack |
Minh Thanh’s export packing, with cardboard covers, plywood tops, strapping and wrapping film, is built to keep water and corners out of the pack; damage inside an intact wrapping is the factory’s question, damage through a torn one is a transit question. For the transit side, see plywood damage during shipping.
Which labels and papers should you check on arrival?
Check that the labels on the panels match the papers in your hand:
- Pack labels: specification, pack number and sheet count, matching the packing list.
- Formaldehyde labels for the US and Canada: producer, lot and certifier on the panels; for Canada in English and French.
- Invoice lines: thickness, face, core, glue and m³ per specification, matching what you measured.
- Certificate files: the CARB P2 / TSCA Title VI certificate and test reports where your customers ask for them.
If the order names a European service class, check it against the label: the BSI record for BS EN 636:2012+A1:2015 covers plywood for structural and general-purpose use in dry, humid or exterior conditions.
A label or invoice error is easier to fix with the supplier on the day of arrival than after the panels are cut. The plywood import documents checklist lists every paper that should be in the set.
How do you build an arrival record that matches the mill’s QC sheet?
Build the arrival record in the same order as the factory’s quality control, so every reading has a twin on the supplier’s side. One folder per container, named by bill of lading number, with:
| Folder | Contents |
|---|---|
| 01 Container | Seal, container number, doors, load as found |
| 02 Packs | Every pack label, the count against the packing list |
| 03 Measurements | Caliper, tape and moisture readings per sheet, with photos showing the tool |
| 04 Faces and edges | Each sampled sheet beside the approved sample; edges |
| 05 Bond | Boil test samples and times |
| 06 Papers | Packing list, invoice, labels |
Minh Thanh runs eight quality checkpoints, from core veneer intake to the sealed container, and photographs the caliper readings, the packs and the loading for your shipment record. With both records organised by pack number, any question is settled by comparing two photos of the same pack. See plywood quality control at the factory for the eight checkpoints.
What should you do when the arrival check finds a problem?
Write to the supplier the same day with the record, not a summary. The message should give:
- The container and bill of lading number.
- The pack numbers affected and how many sheets you checked in each.
- The readings: what the order specified, what you measured, with the photos.
- What you have done with the goods: set aside, still packed, or partly used.
Keep the affected packs as they are until the supplier has seen the evidence. A pack that has been cut or moved into production can no longer show what arrived. For how a supplier reviews a case and how cases are usually settled, read plywood quality claims.
How does an inspection at the factory reduce what you find on arrival?
An inspection before loading catches production faults while the panels are still at the mill, where a sheet can be replaced before the container is sealed. Your own inspector or any agency you appoint, such as SGS, Intertek or Bureau Veritas, is welcome at Minh Thanh’s plant: give the date with the order and production and loading are planned around it, with the factory’s measurement records open to the inspector.
Two checks then remain for arrival: transit damage and the count. Both take an hour, not half a day.
To set the tolerances, sample and inspection date into your next order, send the specification to [email protected]. Free samples go out with the first reply, and the approved sample becomes the standard your arrival check uses. For the full import process, read how to import plywood from Vietnam.
Buyer questions, answered
How do I verify plywood quality on arrival?
Check the seal and pack count first, then open sample packs from the front, middle and back of the container. Measure thickness and size, read moisture, compare faces with the approved sample, inspect edges and run a boil test, photographing each step.
How many plywood sheets should I check when a container arrives?
Open at least three packs, one from the door end, one from the middle and one from the nose of the container, and check five sheets from each: top, bottom and three from inside the pack. Widen the sample when a reading falls outside the specification.
What thickness tolerance should imported plywood meet?
The tolerance on your order decides it. Minh Thanh holds sanded furniture panels to ±0.2–0.3 mm, commercial and film-faced plywood to ±0.5 mm, packing plywood to ±0.5–1.0 mm, and length and width to ±2 mm.
What moisture content should plywood have on arrival?
Furniture plywood leaves the factory at 8–12% moisture content. A reading on arrival close to that range is normal; a much higher reading points to water entry in transit or storage and needs a photo and a pack number.
How do I test plywood glue bond at my warehouse?
Cut small samples from sheets in different packs and boil them in water. UF glue at E0 emission holds for about 6 hours and melamine-fortified glue for about 12 hours in Minh Thanh's factory test; plies that separate early show a bond fault.
What are the most common plywood defects found on arrival?
Thickness outside tolerance, faces below the approved sample, core gaps and overlaps on the edges, delamination, warp, and damage from transit such as broken corners, crushed edges and water stains.
Which plywood defects come from shipping rather than production?
Broken corners, crushed edges, torn wrapping, water stains and mould on outer sheets usually start in handling, transit or storage. Core gaps, delamination and thickness drift through a whole pack start in production.
Should I hire a third-party inspector for plywood on arrival?
For a first container or a large order, yes. An agency such as SGS, Intertek or Bureau Veritas can record the same checks independently; many buyers book their inspector at the factory before loading as well.
What photos should I take when plywood arrives?
The seal and container number, the doors before opening, the load as found, every pack label, each measurement with the caliper or meter visible, faces and edges of sampled sheets, and any damage with a tape for scale.
How do I check plywood face grade on arrival?
Lay sampled sheets next to the approved sample under even light and compare colour, grain, knots, splits and repairs. Grade pairs such as A/B or D+/D refer to face and back, so check both sides.